
Search for a recipe
-
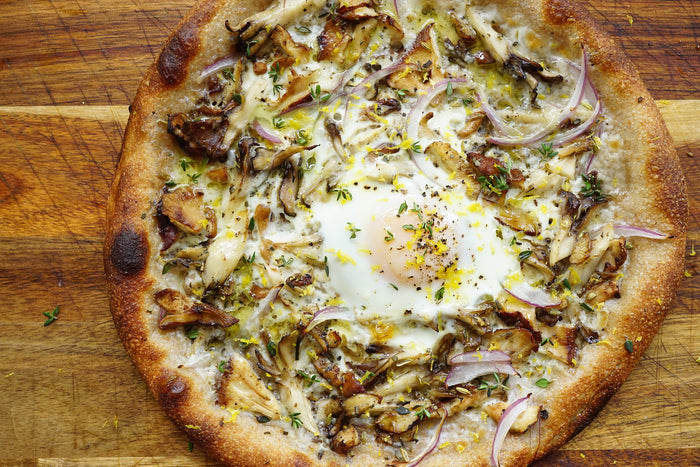 Kernza® Breakfast Mushroom PizzaFeb 01, 2022 | Joe Kaplan
 -
 Regenerative Whole Grain BrowniesJan 27, 2022 | Joe Kaplan
 -
 Kernza® Cinnamon Sugar MuffinsDec 22, 2021 | Christopher AbbottBaked Goods, Breakfast
We prefer these for breakfast next to a hot cup of coffee, but you really cannot go wrong enjoying them at any time of the day. The streusel can be made ahead of time, and it keeps quite well in the fridge. Try it on your favorite pastry!
-
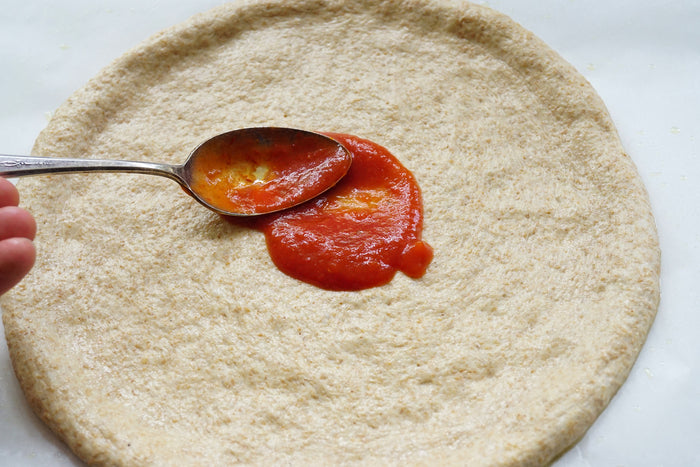
 Joey's Margherita PizzaDec 14, 2021 | Joe Kaplan
 -
 PTK Pizza DoughDec 14, 2021 | Joe Kaplan
 -
 Baking with Kernza®: An In Depth Analysis & IntroductionAug 17, 2021 | Joe Kaplan
Since our Getting Started with Kernza® post, we’ve gone even further into understanding just how and why Kernza behaves the way it does. We’ve done rigorous testing: milling, sifting, blending, baking, comparisons, you name it.
Our aim has been to get a solid idea of how Kernza truly compares to conventional and commercial flours, and, ultimately, aid bakers in understanding what to expect when working with Kernza.
We’ve even gone as far as to send flour samples to a grain analysis lab for rheological testing (Rheology: The study of the flow of matter; used to determine the many aspects of dough quality). Working with this grain is becoming more intuitive to us by the day. The text that follows is a full description of everything we’ve been up to in relation to baking with Kernza. I make a few educated guesses and predictions that I have not had an opportunity to confirm, and there is plenty of new information here for you to generate your own hypotheses.
Short on time? Here's our summary:
- Kernza inclusion percentage with Hard Wheat: 15-25%
- Kernza inclusion percentage with Soft Wheat: Up to 50%. 75% in some cases
- Optimal hydration percentage (100% Kernza): 63-67.5%
- Optimal hydration percentage (Kernza/Turkey Blend): 66-70%
- Optimal kernza mixing time: 6 minutes
- Kernza has starch issues: not enough. Will not set loaves very well without inclusions
- Kernza's gluten structure: Very viscous and somewhat extensible. Not very strong or elastic.
- Shares many similarities with soft wheat
- Kernza struggles to keep fats emulsified. May benefit from cutting back in recipe.
- Sifting, oxidization, vital wheat gluten, ascorbic acid, or additional starch may help boost Kernza's structure formation
- Kernza's flavor profile: Honey, cinnamon, maple syrup, nuts, vanilla, butterscotch, almond extract, brown butter
- Kernza's best applications: scones, pancakes/waffles, quick breads, some cakes, muffins, whole grain preparations
Given the amount of data in this report, it is all broken down into sections making it easier to sift through should you deem only a few sections useful. We feel that this information will give you a substantial jumping off point regarding working with Kernza, and will additionally provide a great reference for many other culinary experiments you may wish to conduct.
Table of Contents
- Milling/Sifting
- Perennial Test Kitchen Bake Tests
- Kernza and Turkey Red Wheat
- Commercial Flour Comparisons
- Experiments in Versatility
- Kernza and Soft Wheat
- Commercial Flour/Versatility Bake Trials
- Final Thoughts on Baking
- Rheological Flour Analysis
- Final Thoughts
Milling/Sifting
What is the look and feel of Kernza: coarse, fine, soft, tough? How do these observational properties compare to similar products from commercial brands? How does this information correlate with finished baked goods? These questions formed the basis of our first round of testing. We needed to know precisely in what ways - before baking - Kernza flour differs from other grain flours, and how we could use this information to optimize our flour.
Right away, it is easy to notice Kernza’s size. It is much smaller than wheat and most other related grains. Being smaller in size means there is much more bran in relation to the starch/gluten protein containing center called the “endosperm.” Each individual particle of bran in our flour also tends to appear a bit larger than in other whole grain flours. A whole grain flour from, say, King Arthur, may contain a much more constant and generally smaller particle size. Though these differences do not diminish flavor, larger bran size does have an impact on ease of baking, as it has the potential to disrupt starch/gluten formation in a variety of different ways. This, in turn, could yield flatter loaves of bread. In quickbreads, cakes, and other “low-structure” doughs, however, larger bran is typically not as much of an issue, if at all.
Through milling and sifting, we were able to incrementally manipulate and test particle size in an attempt to determine what our optimum flour may look like on paper, not just through observation. Details of this experiment are shown below. Each chart contains sifting data for each flour used, including Kernza dried to 10% moisture (our pick when compared other Kernza samples milled at different moisture levels). The mesh numbers (#5 mesh, #10 mesh, etc.) relate to the particle size each lets through; #5 contains wide gaps, and lets through large particles, #230 has extremely small gaps, and lets through only the smallest particles. The way we determined (and continue to determine) flour quality, was by measuring the weight of flour that passed through the #60 mesh sieve. The flour resting in the #160, #230, and Bottom Tray had ideal characteristics (to us and in relative accordance to a commercial flour standard for all purpose flour). As you can see, The Kernza we milled revealed that just over 61% of its flour passed through the #60 mesh, while large scale whole wheat flours sat around 85% or more. Most All Purpose flours will be around 99%! Keep in mind, these are large scale producers with a greater number of resources at hand. Smaller stone millers, such as ourselves, generally have particle sizes slightly less than 85%. It should also be noted that since these tests have been carried out, we’ve had a chance to “dress” (sharpen) our millstones and produce a much finer whole grain flour, but it is still not quite 85%.

Kernza sift analysis

Commercial flour sift analysis
Though Kernza will generally be more coarse than flours from these large scale operations, its post milled texture is also light, fluffy, and airy, whereas wheat’s flour particles are somewhat hard and dense. This is an interesting attribute, as it seems to mitigate the coarseness of the flour, making it seem like it’s slightly larger particle size is less of an issue. More milling tests have been conducted since, where we determined exact mill gap sizes and flow rates as a way of standardizing our product. Given the nature of stone mills, however, the process is ever changing. It really is something that requires daily observation in order to maintain control of standards. Getting a set of small sifting drums is a tremendous help for this. Our process is simply to add 150 grams of flour to the sieve stack, and vigorously agitate it for five minutes. After agitation, flour remaining in each sieve is weighed, and the data is used to define our standard.
Perennial Test Kitchen Bake Tests
Our intent in these applied tests was to gain a better understanding of the effect kernza had when blended with other flours, and make any comparisons between the baking characteristics of these blends and those of other stone milled and commercial flours. Though more testing is yet to come, these initial tests cover a range of applications amongst different varieties of wheat flours (soft wheat, hard wheat, stone milled, roller milled, fresh, aged), and the results provide a great foundational piece to the puzzle when it comes to intuitive baking with Kernza.
Kernza and Turkey Red Wheat
We wanted to see exactly what effect different inclusion rates of Kernza had on end products, and just how well one, if any, compared to pre-purchased, well known flours available for retail.
The first round involved baking a simple whole wheat sandwich loaf with four different inclusion percentages of Kernza (0-75%) blended with Turkey Red wheat purchased from a local farmer and milled in house. Right away, some differences became apparent. It *seemed* as though the 75% blend needed a little more water, because it was having trouble adhering to itself. In addition to this, it was much more sticky than the other doughs. Upon proofing, it also expanded much slower and considerably than the other blends. In fact, there was an obvious positive correlation during this first round of baking that revealed the more Kernza present in the dough, the less it wanted to “pop;” it behaved as though it was less active, which contributed to a lesser increase in volume. This correlation held true throughout the actual baking of the bread as well. Each loaf became substantially smaller as the blend percentage approached 75% Kernza.
You should also take note of the color differences. Yes, Kernza seed is darker than Turkey Red seed, but not by much. A darker loaf can indicate that more may be at play than just a darker color of the raw seed: one of them being an issue of too much starch being broken down too early. Broken down starches readily convert to sugars in the presence of enzymes, and sugars caramelize very easily. Evidence of damaged starch and early enzymatic activity is present in falling number tests, rapid visco analyses, and other dough tests that will be covered in the next section. It is also fairly common knowledge that stone milled flour generally produces more damaged starch than roller-milled flour. Again, whether or not this drastic color change was due to seed color or broken down starch, or both, is up in the air, but the section revealing our lab test results will provide much more insight on why this may be the case.
Ultimately, it was decided that an inclusion rate somewhere between 1% and 25% Kernza would align with the goal of our outcome for this blend. Subsequent testing was carried out (Photos of 0-25% inclusion tests are below as well) in a similar fashion to land on a final blend ratio: 15% Kernza, 85% Turkey Red wheat. Photos of these tests are shown below, and they provide great visual examples of general expectations when it comes to baking with Kernza.

% Kernza blended with Turkey Red Wheat

% Kernza blended with Turkey Red Wheat
Commercial Flour Comparisons
We landed on an acceptable blend ratio; it behaved somewhat normally, proofed well, baked well, and was incredibly delicious. The next question then became “How well does this blend stack up against well established whole wheat flours?” To answer this question, it was decided that we would compare King Arthur, Bob’s Red Mill - both whole wheat - and our own stone milled Turkey Red, each with 15% Kernza. In addition to these three blends, a control loaf made from each unblended flour (excluding Kenza) would also be baked.
Without getting too far into the weeds as far as the results go, here is an overview. In considering flavor, the decision was tough. At some point between the three of us, the Kernza/Turkey blend tied with either the King Arthur blend or the Bob's Red Mill blend. They each contributed their own character that ultimately coerced the decisions to come down to personal preference. It was ultimately agreed upon that the Turkey blend had the most flavor over all: more complex, more potent, strongest aroma, etc. The other two blends were much more mild; some said one of each was bland, others said they were smooth and buttery. Broadly speaking, amongst all six samples, Turkey Red never came in last. Bob’s Red Mill, and King Arthur (blends and controls) both received the lowest score from at least one of us, meaning when it came to flavor, we were on track.There were variations in the look and feel of each loaf as well. The commercial flours yielded extremely smooth doughs, while Turkey Red produced a fairly coarse dough. Adding Kernza to each, as you might expect, added more coarseness and texture. In terms of volume, each was fairly similar, but no final height was exactly the same. The Kernza/turkey blend was the smallest, but not by a substantial amount.
The goal here was to determine whether or not our blend could produce comparable results (better, equal, or slightly less desirable) to popular commercial flours in order to deem it an acceptable substitution. Though the commercial flours we tested had a smoother texture, and produced bread slightly larger in size, comparative differences were slim. It was even said that the crumb of the pure Bob’s Red Mill loaf was too tight, or toothy. To top it all off, Kernza and Turkey Red together created a flavor that was difficult to beat.

15% Kernza blended with a variety of commercial flours
Experiments in Versatility
One final consideration to act upon was how our blend held up in a range of different baking applications. Our conventional pan loaf passed the test, but we were curious to try a focaccia, which required different baking parameters (ingredients, fermentation, times and temps, etc.). This bake test was slightly less involved; only our blend, pure Turkey Red, and King Arthur whole wheat would make up the samples. As a side note: King Arthur’s whole wheat was chosen to be our preferred commercial flour representation over Bob’s Red Mill.
Slight differences between these samples were, again, revealed throughout the baking process, but over all, there were far fewer than there were in the pan loaf trials. The King Arthur dough did come together slightly faster and easier than the other two samples, but a minute or two of extra kneading brought each to a more level playing field. They all proofed wonderfully, and in about roughly the same amount of time. Upon baking, the King Arthur dough was a little firmer than the other two. It also smelled like a conventional whole wheat bread: not too spectacular, but somewhat pleasant. Our blend yielded the softest crumb, and had an aroma that really stood out; it was noted to be very floral and lively. The crumb of each was fairly tight for a focaccia, but this comes as no surprise, because we pulled a very simple and quick-to-ferment recipe from the internet. With some work, we have few doubts this would yield a top notch focaccia. It also seemed as though the Kerza blend focaccia lost more oil after baking than the other two breads. More on that later.

15% Kernza blended with different flours and baked into Focaccia
Kernza and Soft Wheat
It’s been stated before that there is speculation Kernza would make a good stand in for a soft wheat flour. Drawing from a small amount of testing we’ve done in the past, we agree, but we had to continue vetting our new flour specs (particle size, moisture content), to further explain how this conclusion arrived. This round of testing followed the same procedure as the “Turkey Red Trials” mentioned above: start with a broad range of inclusion levels; hone in on a tighter range; pit it against large scale/commercial brands’ and carry out a final test exploring the versatility of our blend. Rather than a pan loaf for our first round of tests, however, we decided to go with scones, as soft wheat characteristics generally lend themselves very well to this style of pastry.
We used a soft white wheat called White Sonora for these trials. It is considered the oldest heritage wheat in the Americas, and has a lovely subtle flavor. As before, the trials began with Kernza inclusion percentages of 0 through 75%, allowing us to later hone in on a tighter range. Upon mixing, the pure sonora dough remained fairly wet and increased in dryness as the amount of Kernza increased. This makes sense, because our Kernza flour had a more prominent bran inclusion, causing it to soak up more water. While baking, the pure sonora scone seemed to hold its shape the best and 75% Kernza, the least. It spread out a noticeable amount as well. None of the scones fell flat, though, and only slight differences in height were observed. Each sample developed a very nice top crust, too.
The taste test was quite an experience. Each sample was absolutely delicious and soft, and the recipe itself was so easy and produced such amazing results, that we had to share it on our website. Go check it out. The most notable change in flavor occurred in the jump from 0% to 25% Kernza. Sonora is delicious on its own. It is also very subtle, however, and our Kernza flour added a great component to the flavor. There was no sacrifice in texture at this point either. At 50%, we noticed a slightly denser crumb, and again in the 75%, but nowhere near something we would consider unpleasant or even “plain.” Each sample was classified as “soft.” It was another tough call selecting a tighter range, here, but ultimately we decided the next round of testing would involve inclusion percentages of 20, 30, 40, and 50% along with a pure soft white wheat control flour. We also used a soft white wheat from Meadowlark Organics instead of the white Sonora from the previous test.
Round two revealed similar results in comparison to the first round: hard to distinguish substantially, but the biggest jump in flavor happening between the control and the scone with 20% Kernza. It was noted here that “Kernza turns sugar into honey.” Make of that what you will, but we consider that a positive trait. At 30% we noticed a “brany-ness” coming through in the flavor. It was not unpleasant, just intriguing. In fact, we deemed the 30% inclusion to be our favorite, because its flavor was the most balanced between the two flours; both were recognizable and seemingly boosted the flavor of their counterpart. Given that final conclusion, it would be a blend of 30% Kernza, 70% Meadowlark Organics’ soft white wheat used in the next round of bake tests.

% Kernza blended with soft wheat

% Kernza blended with soft wheat, showing heights
Commercial Flour/Versatility Bake Trials
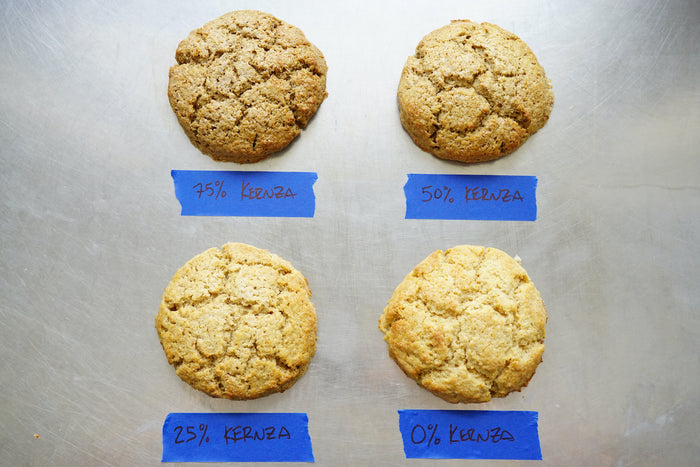
For our final experiment, we lumped two trials together, testing a different style of pastry and a comparison involving commercial flour. Perhaps this is cheating, but we have a business to run here, people. Along with our predetermined blend, the other flours in this trial were, Bob’s Red Mill Whole Wheat Pastry Flour, and pure Meadowlark Organics’ soft white flour. The recipe: Shortbread. We went with Bob’s Red Mill pastry flour, because, well, we had it on hand. But, the package also has a shortbread recipe on the back. This scenario was perfect for a comparison; a recipe developed for a specific flour would represent an ideal standard to emulate.
The final takeaway from this test was, at this point, a fairly standard result when it comes to baking with Kernza. The blend’s cookies fell a touch more flat than those using the other flours. They were also darker. However, and most importantly, they tasted amazing. We even went as far as to say, while the Bob’s Red Mill cookies held their shape the best, they sort of tasted awful. Perhaps we came to this conclusion solely because the other two cookies were so amazing. It’s hard to say. What we were confident in saying, though, is that a blend of 30% Kernza and 70% soft white flour produces a comparable stand-in for a commercial whole wheat soft white flour.
One additional thing worth mentioning is I baked a few scones using our Turkey blend as a side test. They still turned out excellent, and the results suggest an even broader range of applications for this blend than previously thought.

Kernza blended with soft wheat in shortbread
Final Thoughts on Baking
Within this swath of testing, we were able to extrapolate on nearly every baking test we’ve carried out in the past, and really hone in on trends that arise during utilization of Kernza in the kitchen. Some of these trends are well known, while others are relatively new. As each trend is revealed and further testing is conducted, recorded, and repeated, predicting baking outcomes becomes more and more tangible. A condensed iteration that represents everything we know and predict about baking with Kernza follows.
When it comes to pan loaves (or anything of the sort) requiring structure, volume, oven spring and strong bread flour, your Kernza will need help. In fact, I feel it is more appropriate to think of Kernza flour in these applications as taking strength away from bread flour rather than bread flour giving strength to Kernza. Don’t try to strengthen Kernza flour; use it in a way that least diminishes the structure of your strong flour. As we’ve seen: more Kernza in this type of baking will trend positively with less rise, a slightly coarser texture (due to it being whole grain), a slight diminish in its ability to “set” at the end of baking, darker color, slightly stickier crumb (and dough), and higher affinity for water absorption (this is not to say Kernza flour needs more water just because it seems to absorb more, however). To put it generally: it slightly hampers performance, but it tremendously boosts flavor.
Given this knowledge, there are plenty of tricks you can implement when baking breads requiring strength and stability to ensure more satisfaction with your end product. Try starting with an inclusion percentage of about 15-25%. This typically works for us, and it is just the right range to allow plenty of Kernza flavor to still come through. You can also try dropping hydration to around 65%. This is somewhat counter intuitive, as whole grains are typically very thirsty. However, we’ve seen positive results when applying it, and the lab test results in the next section seem to agree. Sifting the flour to rid it of some or all bran content will also contribute to maintaining the structure during mixing and baking, because bran has a tendency to break apart the gluten network when over mixed. It also competes with gluten and starch for water, affecting the development of each. I should note, though, there is evidence stating the minerals and nutrients present in the bran aid in extending shelf life. A few things I have not personally tested yet, but suspect may also help are the following: Allow the flour to oxidize for a week or two (just keep it in a cool dry place with a semi loose fitting lid). Believe it or not, this is a fairly standard practice. Fresh flours continue to undergo changes weeks after milling, and it is at about the two week mark, where these changes begin to flatline. Oxidizing the flour also promotes gluten bonding ability, giving the limited gluten available more strength. Mixing less than one might expect (more on this below) will also benefit Kernza flour ensuring it reaches optimum strength development before beginning to break down. There is also promising evidence that adding extra starch may help the dough’s ability to set during the final minutes of the baking process. The type of starch does matter, however, and it seems like wheat, barley, or something related to taro may be good candidates. Take this with a grain of salt. Again, I have not had an opportunity to test this, but, as you will, again, see below, I suspect Kernza’s starch content (or lack thereof) is a huge factor in why it bakes the way it does. In addition, other dough conditioners like ascorbic acid, vital wheat gluten, and wheat protein isolate have each been shown to improve loaf volume and crumb texture. Ascorbic acid contributes to flour oxidization, while vital wheat gluten and wheat protein isolate can reduce stickiness and improve gluten structure forming ability. I haven’t found a study that combines these conditioners, but it is a common belief that this practice may yet further improve loaf characteristics. Ascorbic acid and vital wheat gluten are also both inexpensive and very easy to find.
When it comes to baked goods similar to scones, pancakes, and quickbreads, it seems Kernza presents fewer issues. This makes sense, because a strong, elastic, stable structure is less important in these applications. There is still a noticeable decrease in these doughs’ structure holding capacity, however. In other words, more Kernza will, across the board, cause a slightly higher spreading out effect even if no rise is required. But, the effect is much less detrimental in these scenarios. Our inclusion range of success is also substantially greater in this category of baking. In a lot of cases, 25, 50, even 75% inclusions yielded great results, and I’ve taken it as far as making banana bread with 100% Kernza flour in the past that turned out quite well.
One final characteristic that I’ve noticed tends to reoccur regardless of what you are baking is that if your dough recipe contains a fair amount of additional fat, it will have the tendency to, for lack of a better term, leak out of the bread during baking. To me, it seems like the dough loses its emulsion, and I first noticed this when I was testing pie crusts. It happened again in both the focaccia and shortbread tests mentioned above. As I briefly explained earlier, I think this may be directly related to the starch content of Kernza. Think is the key word, here. I don’t actually know, but what I do know is that lipids (in the form of fat) have the ability to bind to starches in flours forming an amylose-lipid complex that contributes to some of their network forming properties. If there isn’t enough starch in a flour sample (Kernza) or possibly isn’t the right variety (not enough amylose, too much amylopectin), this additional fat, having nowhere to go, may just seep out of the bread. This observation leads me to believe that where wheat flours can generally handle a higher fat inclusion, a recipe involving Kernza may benefit from a reduction in fat. The only fat present in the scone recipe used in testing came from cream. There was no additional butter or yogurt. In turn, the scones themselves were incredibly soft with a minimal “greasy” feeling. The focaccia and shortbreads, however: noticeably greasy.
Given these findings, it would be great to carry out additional testing. Further exploring Kernza flour’s relationship with fat and oil would be an appropriate next step. I would also like to experiment more with dough conditioners, hydrocolloids, and aging. A research paper I pulled information from regarding similar testing showed promising results. Tests were also conducted on tempered and refined Kernza flour that led to additional benefits. However, I would like to keep my testing in a realm that is useful to home cooks, restaurants, and small scale milling operations. Therefore, if I can’t easily source products necessary for a specific test, I will not prioritize its implementation.

Baking experiment ingredients prepared!
Rheological Flour Analysis
At this point, we were somewhat familiar with Kernza in comparison to other flours. We were even getting accustomed to its behavior in the kitchen: an applied setting. Most of our data, however, was strictly observational and speculative. In order to get a fundamental understanding of a wide range of Kernza’s baking properties, we had to outsource. Great Plains Analytical Laboratory, located in Kansas City, Missouri, ran our flour through a litany of tests, and the results proved to be extremely helpful in understanding Kernza. Below, I’ll do my best to explain each test and what it means in relation to working with Kernza flour. Much of the data aligned with the results of the baking tests, providing helpful additional context. Some of the data, however, was a little abstract and proves difficult for one to draw any solid conclusions from.
Moisture, Ash, Protein, & Falling Number
Moisture is self explanatory here: The sample of flour was 9.6% water. Our intent was to get as close to 10% as possible. We’ll take 9.6.
Ash content refers to the mineral content of a sample. It is obtained by incinerating a small portion of flour and weighing any remaining ash. Minerals do not fully combust and are, therefore, left over after burning. Everything else gets vaporized. The higher the ash content, the more minerals are present in a sample. In grains, the majority of minerals (nutrients) are stored in the bran and small germ. Very few minerals are present in the starchy part (endosperm) of a grain seed, making it, among other things, less nutritious. For example, all purpose flour contains almost no bran or germ. It’s ash content is usually between 0.5-0.6%, whereas Kernza’s is 2.218%. More ash equals a higher mineral content, which equals more bran/germ presence, which ultimately means more nutrients.
Protein is typically an excellent indicator of bread quality. Two proteins, glutenin and gliadin, when allowed to combine in the presence of water, form gluten. It is gluten that provides structural capacity in bread. In most cases, a higher protein content will yield a stronger dough that still has the capacity to stretch and expand. This is revealed in a loaf of bread that has an excellent rise and a high final volume. I say “typically” and “in most cases,” because these guidelines predominantly apply to wheat. Grains other than wheat, even wheat grass, play by different rules.
As you can see, our Kernza sample has a protein content of 15.39%. If a wheat variety were to contain that level of protein, its dough would be among the strongest you could find anywhere. High gluten bread flour (wheat) usually contains around 13% protein. Unfortunately, the protein listed needs the right combination of glutenin and gliadin proteins to form high quality gluten. While Kernza has both, along with somewhat acceptable amounts of each, there are functional and less-functional forms of both proteins. Any glutenin present needs to be “high molecular weight glutenin.” Yes, the weight of each individual molecule determines whether or not that molecule will carry out the desired function. Kernza’s glutenin is predominantly “low molecular weight glutenin,” so it does not perform with the rigor of glutenin present in a high-protein wheat. Instead, its structure is a little less stable. It is partially due to this that we recommend using it in structure deficient baked goods such as quickbreads. Another contributor to the high protein content is the relatively high number of “albumins” and “globulins.” These proteins are not stored where glutenin and gliadin are. They reside in a thin layer of cells just underneath the bran, while gluten and gliadin are contained in the starchy endosperm. Again, due to the high area of bran in comparison to endosperm, the ratio of albumins and globulins will go up, contributing more to the total protein percentage; contributing more of the “wrong” proteins, as they do not serve a strong function to desirable baking properties. A wheat seed is larger, because it contains more endosperm. Making it safe to conclude that an overwhelming amount of its protein comes from (high molecular weight) glutenin and gliadin.
Falling Number provides an indication of the starch quality in a grain. The method used to produce this number utilizes a machine that operates by heating a mixture of flour and water in a small vial to make a thick slurry. Once heated and allowed to thicken, a small plunger is placed just on top of the slurry, and allowed to fall through it until it reaches the bottom of the vial. The falling number itself is literally the amount of time, in seconds, it takes the plunger to reach the bottom of the vial. Every falling number is greater than 60, because the mixing and heating time is taken into account for each test. As you may have guessed, thicker slurries are more viscous and produce more resistance to the plunger. So, the thicker the slurry, the higher the falling number.
A general sweet spot for wheat and a few other grains is a falling number around 200-250 seconds. I have seen a few cases where a falling number at or just slightly over 300 is acceptable as well. Too weak of a slurry (low falling number) typically means there is a significant amount of damaged starch or enzyme activity already present in the grain. Damaged starch usually occurs during milling, and a literal breaking of starch granules causes a decline in their stability during hydration and heating. A high enzyme activity can also involve damaged starch, but it usually begins in the field before, during, or immediately after harvest. If a grain begins to germinate too soon, before it has had a chance to dry down to a storage moisture content, enzymes present in the seed will begin breaking down the starch, again causing a loss in stability.
On the other end of the spectrum, too high a falling number can also be detrimental. From what I’ve gathered, this is usually above 350, and this typically means there is not enough damaged starch. A certain percentage of damaged starch (around 8-10%) is incredibly helpful during baking; the starch chains are broken down enough to become food for the yeast when it is added, increasing its vigor. The falling number is usually a very reliable predictor of potential flour performance.
Take a look at the two samples: 100% Kernza, and our Kernza/Turkey blend. The blend has a falling number of 340, while 100% Kernza flour’s is 152. A drastic difference. And, as you will see upon continued reading, Kernza does, indeed, have a starch deficiency. The blend may also seem fine for practical uses, but other factors need to be taken into account - whole grain flours in particular, because there is so much variability from product to product - before one can definitively say “this is a completely acceptable flour to use in most applications.”
One final point to keep in mind: The falling number provides data on a specific sample, and falling numbers produced by grain taken from the same plot can vary year to year due to the heavy influence of environmental factors. I suspect the falling number taken from this specific sample may represent the low end of Kernza’s range, and I am confident that subsequent generations of Kernza will reveal an increase.

100% Kernza

Kernza and Wheat blend
Wet Gluten is a quick and easy indicator of pure gluten quality and quantity in a given sample of flour. It is expressed as a percentage, by weight, of the gluten network remaining after a dough has been formed, and all of the water soluble components of it have been washed off. The idea is: higher quality gluten is better able to form a structure around water, thus holding more. Therefore, the higher the percentage of wet gluten, the higher the quality and quantity of gluten forming potential is present in your dough.
The results we obtained from each of our samples were <10% wet gluten content from pure whole grain Kernza, and 28.83% from our blend. As a benchmark, most strong hard wheat flours have a wet gluten content ranging from 30-45%. This range of percentages represents the highest quality/quantity, however, and does not mean anything below is unacceptable. I have seen results from other hard wheats weighing in at 27%. The soft wheats that I have seen are around 19-22%. Judging by Kernza’s wet gluten percentage, it is pretty clear that it needs a little help should one need a boost in baking performance. It also seems that the addition of our Turkey Red does just that. It looks like we’re on to something here.
A final note: Once wet gluten is isolated, there are a few additional tests that can be carried out to hone in on a more precise relationship between quality and quantity of gluten. They involve spinning the gluten ball in a centrifuge to separate the strong and weak glutens and determine the ratio between the two; and drying the gluten to determine its water holding capacity. For now, we are sticking with the initial test considering the extent of additional testing conducted on our flours.
Bullet point? *High nutrition and fiber, high protein, lacks structure forming proteins.
Extensograph
The extensograph is a great tool that provides insight on dough characteristics and behavior before baking. This information can, in turn, be used to predict what will happen when baking actually does occur. Generally, the shape of the graph reveals how positive the interplay is between glutenin and gliadin (the two proteins that form gluten). It also reveals a potential hydration to consider when baking.
Take a look at the graph below depicting an extensogram (the graph made by an extensograph) of 100% Kernza flour. It is a tall, thin spike. Its height is around 1400 BU, or “Brabender Units.” Just know they are a unit of force: in this case, resistance to extension. The horizontal axis depicts length in centimeters. Seeing as the extensograph literally stretches a piece of dough, imagine what would need to happen to produce a graph like this: A lot of force would be applied to stretch the dough a very small amount before it snapped. In other words, the dough cannot stretch without breaking. This is not ideal for a loaf of bread. Instead, an extensogram depicting more of an upside down “U” or rainbow shaped curve is a sign of a dough that resists extension just enough to stretch a little farther.
Take a look at the extensogram produced by our Kernza/Turkey Red blend. According to it, the dough formed here looks much more like what one would desire when making a loaf of bread. Although, when compared to the extesogram of a high quality, high protein dough (bread flour), it is still lacking. Imagine the graph being pulled to the right and slightly upwards, and you have just pictured a more ideal extensograph.

100% Kernza

Kernza and Wheat Blend
Farinograph
A farinograph reveals many dough quality properties that arise specifically during the process of mixing flour and water. There is no stretching, proofing, or baking. Essentially, as two paddles mix the dough, they are measuring the force of resistance. Continued mixing increases the dough’s strength until a peak viscosity has been reached. After this point, continued mixing will slowly begin to break down the structure that had formed. The results from this process give bakers an idea of how much water to add to a given flour, the amount of time it takes for optimal consistency to form, the extent to which it breaks down after peak consistency is reached, and how quickly it will do so.
Though all of this information is very helpful, it does not always paint a full picture of how your flour will actually perform. As it was explained to me, it is just a strength reading; it determines how strong isolated components in a flour can become, but does not correlate to the total quantity of said components in the flour. It is for this reason that farinographs and extensographs should be used in tandem to give a broader picture of a flour’s performance.
With that being said, the 100% Kernza farinograph reveals some important information to, at the very least, get you in the ballpark of how to treat your dough.
Water absorption may be the most straightforward data point: Start with 62.7 - 67.5% water to flour by weight. Each of the two numbers represents an optimal percentage corrected for different variables, so creating a range between the two should be alright.
Development time is the amount of time it takes for a given dough sample to reach peak resistance i.e. maximum strength. The good news here is that there is usually a direct correlation between the development time on this test, and while mixing your own loaf of bread. Our Kernza sample’s time was six minutes. Generally one looks for longer development times, because it can be an indicator of a more stable dough. A dough that peaks too quickly is more likely to break down faster, as well. Stronger flours usually sit around 8-11 minutes of mixing before reaching maximum strength, so at six minutes, kernza flour is not far off. What this should really tell you, however, is that while mixing your own dough, be very aware of what it is looking like at the six minute mark. Once this point is reached, overmixing is approaching very quickly if it hasn’t happened already.
Stability indicates the “endurance” of your dough in minutes. Longer stability time is equivalent to a longer period of time in which your dough holds near maximum strength. A longer period of time is, again, more desirable in this case. A stable dough will be more versatile in ever changing circumstances: humidity, room temperature, differing fermentation times, inconsistent mixing, etc. It gives the processor more “wiggle room.” To, once again, compare Kernza to a relatively strong wheat, notice its stability is 6.7 minutes. On the graph, this is the range where the curve breaches 500 FU (or BU in some cases), and subsequently falls back below it. FU and BU are units of force or strength. 500 BU is used as a standard for characteristics of a desirable dough. In stronger wheat flours, I have seen stability times of up to 23 minutes, and suspect an even greater number of minutes may be possible.
Though there are more data points on this graph, the three mentioned above are typically the most helpful. They will tell you how to treat your dough, and how it will behave in an unpredictable environment. I should reiterate, however, that this graph should not be a sole judgment on the quality of a flour, and a comparison between the results produced by each flour provides a great example as to why. The Kernza/Turkey blend results show a very short development time, an even shorter stability time, and a short breakdown time. Short farinograph times are usually undesirable; longer development, stability and breakdown are traits of strong, resilient doughs. The results produced by 100% Kernza flour look much better, but as we know, the performance of Kernza flour cannot compete with wheat in a baking application. This is precisely the reason why a farinograph needs to be considered amongst a range of other tests in order to get a complete picture of flour quality and performance.
As to why the blend produces such short time intervals, I have a feeling it may have a lot to do with the introduction of more (and potentially stronger) bran contributed by the wheat. Because this dough is being mixed throughout the entire procedure, the bran’s effect may take hold sooner, thus causing a more rapid dismantling of the gluten/starch network. This is a simple explanation, and there is always more at play, but I think it is a significant factor.

100% Kernza

Kernza and Wheat blend
Rapid Visco Analyzer
The final test on our flour samples was carried out by the Rapid Visco Analyser (RVA). This machine, much like the two mentioned previously, measures viscoelastic properties of a dough. However, the RVA is designed to bring out behavioral characteristics of starches present in grains. It works by mimicking a standard baking process, and records the viscosity of hydrated starch along the way. There are three temperature phases: heating, holding, and cooling, and the starch’s behavior throughout each phase has the potential to reveal an aspect of the final bread quality.
Two important roles of starch in baking are: providing food for yeast, and preventing the structure (formed by gluten) from collapsing. In other words, starch is responsible for “setting” the dough in the final moments of a bake. The type of starch also determines how rapidly the bread will harden as it sits in storage. Starch works hand in hand with gluten. It helps trap water and CO2 and eventually sets the structure after a certain amount of cooking. A dough without starch (just gluten, and assuming yeast had something else to eat) might still rise while baking, but without the starch to keep it in place, would fall flat. Therefore, starch quality/content is in direct correlation with loaf volume.
The red line on the RVA graph represents temperature changes, while the blue line represents the real time viscosity of the hydrated flour. There are six variables along the blue line to take into account: Pasting Temperature, Peak 1 (peak viscosity), Trough 1 (hold viscosity), Breakdown (viscosity), Setback, and Final Viscosity.
The pasting temperature represents the minimum temperature required to cook the starch in a given flour. It is at this point that the viscosity of the mixture begins to increase. This is caused by the swelling of individual starch granules due to increasing temperature. And should be noted when considering heating/cooking options for your dough. In many cases, it can be used to predict final loaf volume. A delayed pasting temperature is generally preferred when a high final bread volume is sought after, as it is a sign of higher amylose content. More on this in the following paragraph.
Peak viscosity represents the point during heating at which a dough has the highest viscosity, or thickness. It may seem counterintuitive, but a high peak viscosity does not necessarily mean a higher quality of starch. Starch is composed of two molecules: amylose, and amylopectin. We don’t need to get into too much structural detail here, but due to their difference in size, weight, and shape, they behave differently when hydrated and exposed to heat. As was briefly mentioned above, in this hot wet environment, starch granules begin to swell, and amylopectin is the main contributor to this attribute. It is this increase in size that causes the increase in viscosity. During this phase, the amylose molecules begin to “leach” out of the granule and into solution. This event counteracts and reduces the rate of granular swelling. This is an important step, because a delay in starch swelling increases its stability. If starch granules swell too much too quickly, they will rupture and degrade earlier in the baking process, losing a portion of their contribution to the bread.
A comparison between hard and soft wheat provides a good example of amylose’s role in peak viscosity. Hard wheat has a higher percentage of amylose than does soft wheat, and in many studies I’ve come across, soft wheat has a significantly higher peak viscosity, meaning less amylose is leeched, and amylopectin is able to swell freely (gliadin is also partially responsible for an increase in viscosity). With the quick swelling of soft wheat flour comes an early structural failure (revealing a low starch integrity) and, ultimately, poor bread volume. This is a major reason soft wheat is rarely used when a large loaf of bread is a desired outcome.
Breakdown viscosity is the value given to the difference in “peak” and “hold” viscosity. At a certain point (with enough heat), all starch will rupture, and its structure will be compromised. After this rupture, viscosity will drop to a certain point and remain there for a certain period of time. This post-rupture constant viscosity is the “hold viscosity,” and it occurs at some point after the RVA machine reaches a temperature of 95 degrees celsius. The degree of loss in viscosity is yet another indication of starch content and stability, and, again, it is the relationship between amylose and amylopectin that determines the level of breakdown. A more substantial drop in viscosity could mean a high peak viscosity which is an indication of a lack in amylose. In addition to preventing granular swell, amylose is also responsible for setting the dough during baking. Not enough amylose and your bread will collapse regardless of how strong the gluten network is. So, the more the viscosity drops (higher breakdown value) during this phase, the less stable the starch content is said to be. This is an interesting point, because our 100% Kernza flour saw a significantly smaller drop in viscosity (proportionately) than the Kernza/Turkey Red blend. However, digging into research publications studying similar topics, I’ve found this to be a common occurrence. Kernza’s starch may be more stable than wheat’s. As to why, there could be a number of reasons: higher minerality provided by the bran, high lipid (fat) content, or the ratio of amylose to amylopectin all contribute dough conditioning like properties to the starch. I have yet to find an exact explanation.
Unfortunately, this is not a smoking gun for a complete explanation for how Kernza will behave in the kitchen. As mentioned earlier, the bran may also be detrimental to the gluten structure. What’s more, the overall viscosities of each RVA parameter (from 100% Kernza flour) are very low, implying, again, that there is not enough starch for it to really contribute anything substantial to the flour’s integrity. Something this information may allude to, however, is the potential of a starch isolate from Kernza: being that it seems to be stable and resilient, it may be a practical starch to use in cooked products that require thick texture after prolonged cooking (sauces, soups, pudding, etc.) I may be completely full of it, here, but I did find a paper that mentioned this as a possibility.
The final viscosity and setback viscosity are parameters that typically correlate with the way a flour will behave while it is cooling after cooking. Where final viscosity is, aptly named, the final viscosity reading taken during the analysis-after cooling and time have expired, the setback viscosity is the difference in viscosity between peak and final viscosity. Depending on the type of starch, the viscosity during cooling will increase substantially or nominally. A substantial increase in viscosity corresponds to a high amylose content relative to amylopectin. Amylose is the portion of starch that has the ability to quickly form thick gels upon cooling. It is this quick action that is responsible for setting the dough. Though it contributes positive attributes during baking, a high concentration can lead to products becoming too firm as they cool. However, a higher concentration of amylose along with fat and minerals derived from the bran will contribute to the bread maintaining its quality in the long term as opposed to drying and solidifying even more as the amylopectin retrogrades. Where amylose sets quickly, amylopectin “recrystallizes” days after cooling, and it is the main contributor to bread staling. Again, this is all about the balance between amylose and amylopectin. Too much or too little of each can have a positive and negative effect. Not only that, (to get even more complicated here, sorry) the average shape and size of each of these molecules will cause even more changes in dough characteristics. For example: Amylopectin consisting of longer than average branch chains can mimic the effect of amylose.
We don’t need to worry about long chain amylopectin in our experimentation, but it ties in to an important point: There are a seemingly endless number of factors contributing to any given doughs behavior during processing: gluten is formed by gliadins and globulins which behave in specific ways; the type of gliadin and globulin again contribute another layer of behavior changes; the many variations of starch contribute another set of factors interacting with each other, each gluten component, the fat in the bran, and the bran itself, and each of these interactions interact with every other combination of interactions. It really seems as though predicting anything about flour with one hundred percent certainty is impossible, and getting to a point of just-applicable-certainty can be quite frustrating. To add to this frustration, the amount of research done on Kerza rheology pales in comparison to that of wheat. However, more studies on Kernza are being published each year, the majority of them coming from the University of Minnesota, and I have no doubt that culinary predictions, standards, behaviors and traits will all be determined and compiled in no time.

100% Kernza

Kernza and Wheat blend
Final Thoughts
With all of this information, it is still difficult to draw many solid conclusions when it comes to cooking and baking with Kernza. The graphs and data points may allude to something, but carrying out actual baking may tell a different story. One thing, I feel, that may help in experimenting with kernza at home or in the kitchen is the fact that the individual seeds are so small. This fact is really the foundation to what throws everything off. It increases the bran to endosperm ratio, which means it has a high protein content; it’s just the wrong type of protein. If Kernza were a larger seed, the starch characteristics may show some promise, but there just isn't enough per gram to contribute much at all. No number on the RVA graph got very high when compared to wheat, even though the shape of the pasting curves look similar (perhaps even better) at a glance. More starch per seed may also help mitigate the undesirable gluten characteristics to a certain degree. For a while, the seed was even too small to remove the bran for a refined flour, though a study published in 2019 determined the size in some strains was finally to a point where tempering and bran removal were possible. Refined Kernza flour does show more promise across the board when it comes to ease of cooking and usability. That being said, whole grain Kernza is what's available for now, so remember: it's small. Small things need a little help sometimes. The help, in this case, will probably come from a little (or a lot of) extra wheat flour, although certain dough conditioners, hydrocolloids, perhaps some refined starch might help out as well. It is also important to keep in mind that a lot of the properties mentioned above are what is required for a higher quality loaf of bread or something of similar nature. Quick breads, cookies, and no-structure-neccessary baked goods are usually a great fit for Kernza (in case you jumped around, read the “Final Thoughts on Baking” section for more on this), but I now know that they have the capacity to firm after cooking a little more than one might expect (amylose).
It is my hope that anyone will be able to pull at least one useful bit of information from this post to make an accurate prediction much like the one mentioned in the previous sentence. I also hope this article motivates continued fearless experimentation with Kernza. This grain deserves all of the attention right now, because of its tremendous potential to help stave off climate change and heal soil. It is also incredibly delicious, and we have yet to find a flavor profile that it does not work well with. It is truly a powerful and versatile grain that is becoming more so each year, so help save the planet, and eat more Kernza, people!
-
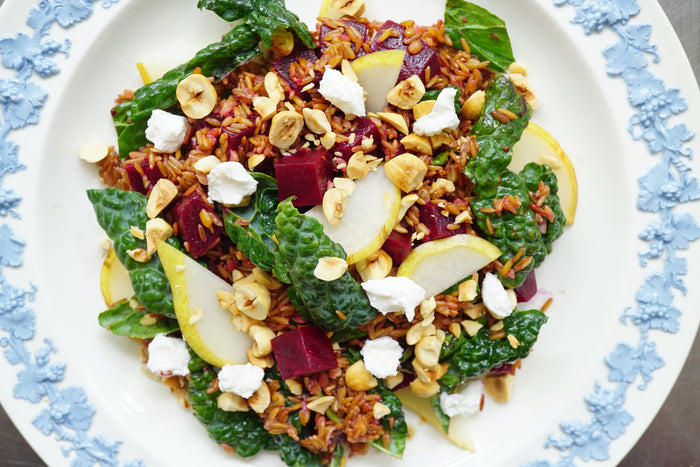 Kernza® Beet, Kale, and Pear SaladMay 26, 2021 | Joe Kaplan
 -
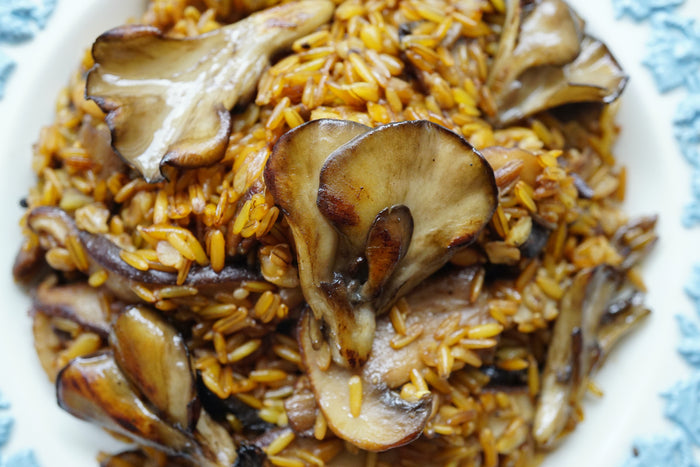 Kernza® Mushroom Medley SideMay 26, 2021 | Christopher AbbottThis is an easy Kernza side that accompanies a myriad of entrees. It is meant to be simple and versatile. Use the vinegar and sherry we recommend, or don’t. Play around with virtually any combination of acids and cooking wines. You can even try adding additional ingredients. This “base recipe” is great on its own, but the directions one can take with it are endless.
 -
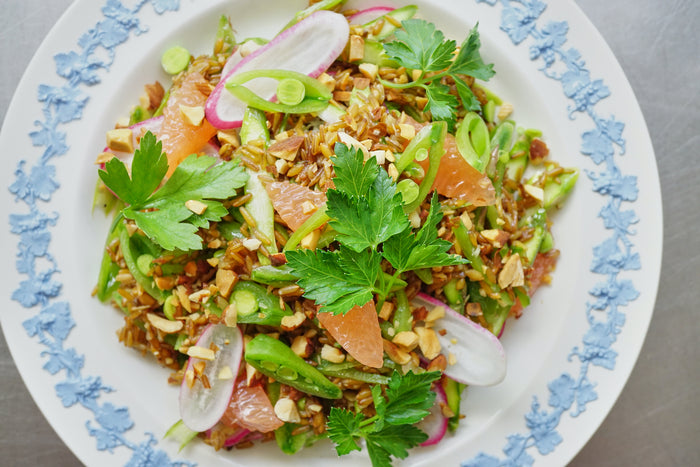 Kernza® Spring Vegetable Salad with Grapefruit VinaigretteMay 26, 2021 | Christopher Abbott
Light and bright is the name of the game with this one. Kernza adds a great layer to a refreshing salad!
-
 Find a RecipeMay 04, 2021 | Perennial Pantry
View our Getting Started with Kernza post to get cooking and baking tips for using Kernza Whole Grain and Kernza Flour. Read our Baking with Kernza post for an in depth analysis and introduction.
Looking for something specific? Search for a recipe within the Perennial Pantry website.The recipes below are listed in 6 categories. Click on the photo to access the recipe or hover over the photo to see the recipe title.
Breads & Rolls
Baked Goods
Pancakes
Savory Baking
Desserts & Sweets
Whole Grain
-
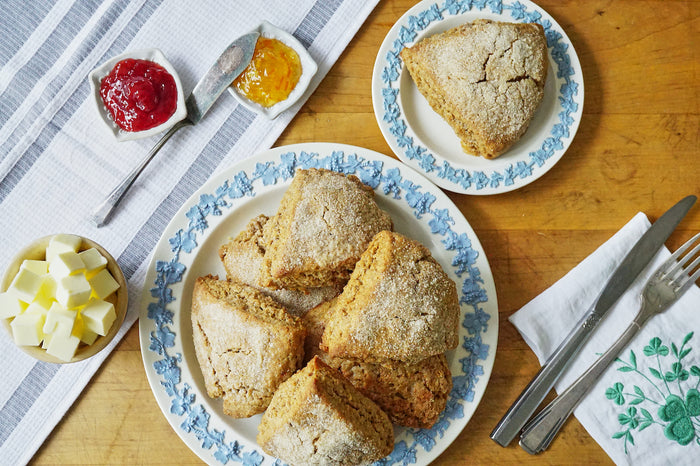 Easy Versatile Kernza® SconesApr 26, 2021 | Christopher AbbottBaked Goods, Scones
We’ve been testing a lot of Kernza® blends in the test kitchen lately: Kernza and hard red wheat, soft white wheat, white sonora flour, all purpose flour, the list goes on. When testing many slightly different samples for comparison, it helps to use a simple base recipe with few ingredients and fewer steps in order to eliminate unwanted variables. Recently, we came across this scone recipe from food52.com that checked each of those boxes. By the end of testing, we decided the scones were so delicious, that we had to share the recipe with you. So here it is (along with a few additional notes and suggestions).
This recipe is not only simple; it’s versatile. Each of our blends mentioned above yielded great results. You can essentially blend equal parts Kernza flour with any flour you have on hand, and you will not be disappointed. Our favorite blend was Kernza with whole wheat flour (we used Bob’s Red Mill’s whole wheat), with 100% Kernza coming in a close second. However, you really cannot go wrong.
-
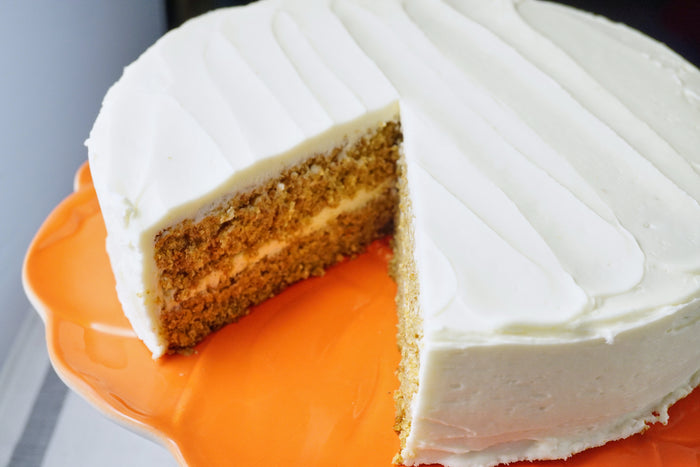 Kernza® Cake with Milk & Honey ButtercreamApr 01, 2021 | Christopher AbbottCake, Desserts
You don’t need to have a celebration scheduled to enjoy this cake. Just have it for dessert...tonight. It’s good. Our Milk & Honey Buttercream frosting will do wonders for you, but honestly, the cake itself will work well with any topping.
Pro tip: A ⅔ batch of cake batter will yield about a dozen cupcakes if that’s your thing.
-
 Kernza® PancakesDec 26, 2020 | Joe KaplanBreakfastBreakfast is awesome. Now it is awesome-er. Kernza makes an incredible pancake due to its cake-flour-like attributes; meaning your pancakes will stay soft and fluffy, and you will never have to worry about over mixing the batter. We have two versions for you: If you live with no regrets, try the buttermilk cakes; If you don’t do dairy, try the dairy free cakes! If you really live with no regrets, try both. It is quite challenging to decide which is better. As a bonus, there is a third butter/oil-free recipe included, which can also be found on the back of our Kernza flour packages!
Breakfast is awesome. Now it is awesome-er. Kernza makes an incredible pancake due to its cake-flour-like attributes; meaning your pancakes will stay soft and fluffy, and you will never have to worry about over mixing the batter. We have two versions for you: If you live with no regrets, try the buttermilk cakes; If you don’t do dairy, try the dairy free cakes! If you really live with no regrets, try both. It is quite challenging to decide which is better. As a bonus, there is a third butter/oil-free recipe included, which can also be found on the back of our Kernza flour packages!
Method
- If using butter or coconut oil, melt on stove top or in the microwave.
- Begin pre heating a non-stick pan or skillet to medium low heat
- In a large mixing bowl, combine both flours, sugar, salt, baking powder, and baking soda, and mix until combined.
- In a separate bowl, whisk the wet ingredients together: milks; oil, butter, or coconut oil; and an egg.
- Add the wet ingredients to the dry ingredients, and stir with a rubber spatula until fully combined.
- Apply a thin layer of oil or butter to the pre heated non-stick pan or skillet.
- Use a ladle or “pour-friendly” container to pour the batter on to the skillet.
- Cook for about four minutes on one side (the edges will start setting; bubbles will form in the middle and eventually start popping).
- Flip the pancakes and cook for an additional two minutes.
- Eat immediately, or keep warm in a 200 degree oven.
Ingredients
Ideal, but not imperative, that they are at room temperature.
Quick and Easy (no oil or butter)
- 1.5 Cup Kernza Flour
- ½ Cup All Purpose Flour
- 1 ⅓ Cups Milk
- 1 Large Egg
- 2 Tbsp Sugar
- 1.5 Tsp Salt
- 1 Tsp Baking Powder
- ½ Tsp Baking Soda
Buttermilk
- 1.5 Cups (150g., 5.3oz.) Kernza Flour
- 1 Cup (140g., 5.0oz.) All purpose flour
- 1 ¼ Cup (283g., 10.0oz.) Buttermilk
- ½ Cup (130g., 4.5oz.) Milk
- ¼ Cup (4 Tbsp., 56g., 2oz.) Unsalted butter
- 1 Egg
- 3 Tbsp. (72g., 2.5oz.) Sugar
- 1.5 Tsp. (8.5g., 0.30oz.) Salt
- 1.5 Tsp. (6g., 0.25oz.) Baking powder
- ½ Tsp. (3g., 0.1oz.) Baking soda
Dairy Free
- 1.5 Cups (150g., 5.3oz.)Kernza Flour
- 1 Cup (140g., 5.0oz.) All purpose flour
- 1.5 Cups (195g., 6.88oz.) Oat milk (or your preferred non-dairy milk substitute)
- ¼ Cup (25g., 0.87oz.) Coconut or Canola oil.
- If using coconut oil, make sure it is not solidified
- 1 Egg
- ¼ Cup (96g., 3.4oz.) Sugar
- 2 Tsp. (8g., 0.28oz.) Baking powder
- ½ Tsp. (3g., 0.1oz.) Baking soda
Equipment
- Mixing Bowls
- Spatula
- Whisk or fork
- Ladle
-
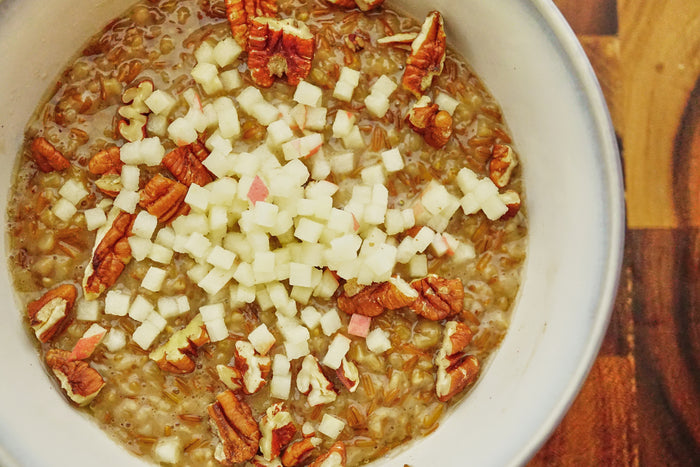 Kernza® OatmealNov 27, 2020 | Joe KaplanBreakfast, Cereal, OatmealKernza goes great with your favorite oatmeal preparation. These recipes are meant to serve as a base, giving you freedom to add your favorite oatmeal toppings! Included are recipes for steel cut and rolled oats. If you would like to increase the batch size, you can save any un-eaten oatmeal in the freezer!
Kernza goes great with your favorite oatmeal preparation. These recipes are meant to serve as a base, giving you freedom to add your favorite oatmeal toppings! Included are recipes for steel cut and rolled oats. If you would like to increase the batch size, you can save any un-eaten oatmeal in the freezer!
Method using Steel Cut Oats
- Place Kernza grain and steel cut oats in a container, and cover with water.
- Place container in fridge to soak overnight or at least five hours.
- When soaked, drain the oats and Kernza.
- Place grains, salt, sugar, and cinnamon in a small sauce pot, and cover with one cup of water and almond milk.
- Heat on stove top at high heat while stirring.
- Once it begins to boil, reduce the heat to low to maintain a simmer, and cover the pot
- Set a timer for twenty minutes.
- Stick around for the first five minutes in case the liquid decides to boil over.
- Once a slight simmer is maintained, it is alright to walk away. Stir occasionally if you’d like.
- When twenty minutes are up, stir the oats, taste, and adjust seasoning to your liking.
- Add your favorite oatmeal toppings, and enjoy warm.
Method using Rolled Oats
- Repeat steps 1 through 8 above, but this time, use only the Kernza grain.
- When 15 minutes of cooking have elapsed, add rolled oats, and stir to incorporate
- Cook for the additional five minutes.
- When finished, adjust seasoning as you see fit.
Ingredients
- ½ Cup (85g, 3.0oz.) Kernza Grain
- ½ Cup (85g, 3.0oz.) steel cut oats or ¾ Cup (68g, 2.4oz.) rolled oats
- 1 Cup (250g, 8.8oz.) water
- 1 Cup (250g, 8.8oz.) Almond milk
- You may substitute with milk, or just add an additional cup of water
- ½ Tsp (2g, 0.07oz.) salt
- ¼ Tsp (0.6g, 0.02oz.) ground cinnamon
- 1 Tbsp (5g, 0.2oz.) brown sugar
Equipment
- Small Sauce Pot
- Rubber spatula
- Small container or mixing bowl
-
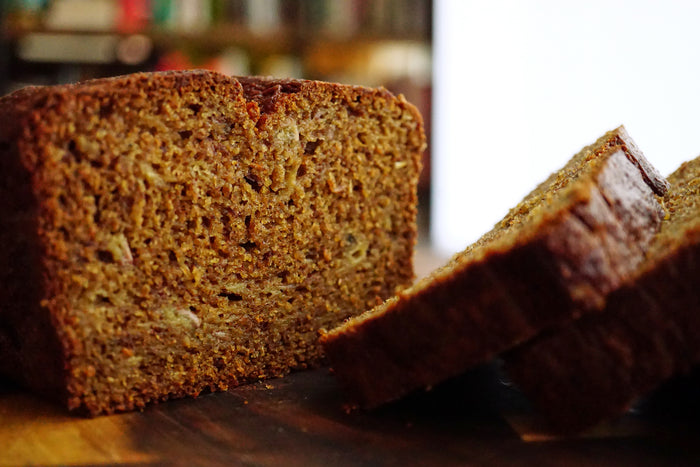 Kernza® Banana BreadNov 27, 2020 | Joe KaplanBaked Goods, BreadAs it turns out, Kernza and banana bread are meant to be. Every stand out quality of Kernza flour is showcased perfectly here, and the recipe itself is so easy: No “creaming” butter and sugar in a cumbersome stand-mixer, no worrying about whether or not the butter is the right temperature, no unconventional or hard-to-find ingredients. Just mix, pour, and bake.
As it turns out, Kernza and banana bread are meant to be. Every stand out quality of Kernza flour is showcased perfectly here, and the recipe itself is so easy: No “creaming” butter and sugar in a cumbersome stand-mixer, no worrying about whether or not the butter is the right temperature, no unconventional or hard-to-find ingredients. Just mix, pour, and bake.
Method
- Preheat oven to 375 degrees F
- Melt ½ stick of butter on stove top or in the microwave
- In a small bowl, add peeled bananas and “smash” with a fork or potato masher
- Once they turn “gloopy” and have developed a sheen, you’re done.
- In a separate bowl, whisk melted butter and brown sugar together
- Add one egg to sugar/butter and whisk until fully combined
- Add yogurt, vanilla extract, and the smashed bananas to the sugar and lightly whisk until everything is well incorporated
- In another bowl, add Kernza, salt, and baking soda, and whisk to combine
- Pour the wet mixture into the dry mixture, and gently stir together with a rubber spatula until no more dry flour can be seen.
- Prepare your loaf pan:

- Grease the inside with butter, oil, or Pam.
- Cut a piece of parchment paper to fit inside and cover the three long sides of the pan and extend above the top of the pan (this provides parchment “handles” that will allow you to remove the baked loaf from the pan easily).
- Spray again with Pam, or add another coating of oil/butter
- If you do not want to use parchment, sprinkle a light coat of all purpose flour over the entire inside of the pan after it has been greased.
- Add batter to the pan, smooth out the top, and make an indent lengthwise in the batter with the edge of your spatula

- Place the pan in the oven on the middle rack and bake for one hour and ten minutes, rotating half way through.
- When finished baking, allow the banana bread to rest in the pan until you can comfortably hold it in the palm of your hand (about 45 minutes)

- Enjoy plain or with a generous smear of butter and salt.

Ingredients
- 2 Cups (200g, 7.0oz.) Kernza Flour
- 4 overripe bananas (roughly 435g, 15.3oz.)
- They should be very spotty with possibly some bruises.
- ½ Cup (110g, 3.9oz) brown sugar (optional, for added sweetness)
- ⅓ Cup (80g, 2.8oz) plain yogurt
- We used 2% Milkfat, Fage brand yogurt
- ½ Stick (56.5g, 2.0oz, 4 Tbsp.) unsalted butter
- 1 Egg (roughly 50g, 1.75oz.)
- 2 Tsp (11g, 0.4oz.) coarse salt
- 1 Tsp (5.5g, 0.2oz.) baking soda
- ½ Tsp (3g, 0.1oz.) vanilla extract
Equipment
- 1 Standard Loaf Pan- Close to 8.5” x 4.5” x 2.75” dimensions
- Mixing Bowls
- Small Sauce Pot
- Fork or Potato Masher
- Rubber Spatula
- Whisk
- Parchment Paper
- Pam (optional)
-
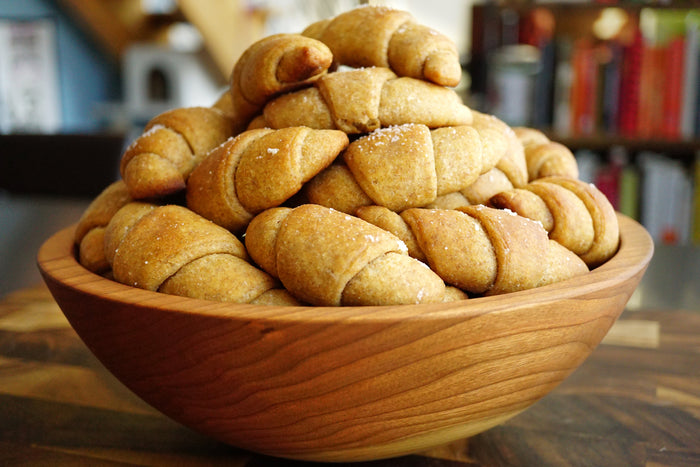 Grandma Tee’s Crescent RollsNov 11, 2020 | Joe KaplanBread, RollsI have eaten these rolls nearly every Thanksgiving for as long as I can remember. They are near and dear to my heart, as I copied the recipe straight from my late grandmother’s handwritten notecard. Though she used solely all purpose flour, the addition of Kernza works incredibly well. Unsurprisingly, they are quite famous in our family, and will no doubt be a hit amongst yours should you decide to give them a try!
I have eaten these rolls nearly every Thanksgiving for as long as I can remember. They are near and dear to my heart, as I copied the recipe straight from my late grandmother’s handwritten notecard. Though she used solely all purpose flour, the addition of Kernza works incredibly well. Unsurprisingly, they are quite famous in our family, and will no doubt be a hit amongst yours should you decide to give them a try!
Method
- Heat one cup of water, 1 stick of butter, and the salt together in a sauce pot until the butter has completely melted. Remove from heat.
- Add the yeast packet to the remaining cup of water (which should be at room temperature or cooler), and stir until well incorporated.
- Combine both flours and the sugar in a large mixing bowl. Whisk to combine.
- Combine the yeasted water, and the warm buttered water. Whisk until somewhat homogenous.
- Add the water to the flour mixture.
- With a spatula, begin to combine the water and flour into a dough.
- Once everything is combined, continue mixing gently until the dough can hold one shape, but is not strong. About thirty seconds.
- Do not knead. Less is more here.
- Turn the dough ball out into a separate greased (butter, pam, etc.) bowl, cover with plastic wrap, and let sit at room temperature for one hour, or until the dough has risen at least fifty percent.
- Once time is up, move the bowl to the fridge, and allow it to chill overnight.
- The following day, remove the dough from the fridge, and separate it into four portions. Keep one section out, and place the other three back into the fridge.
- Melt one stick of butter.
- Shape the dough portion into a circle with your hands.
- Lightly flour your rolling surface, the top of the dough portion, and your rolling pin with all purpose flour.
- Roll the dough into a circle until its diameter is roughly eleven to twelve inches.
- Brush the entire surface with the melted butter.
- Cut the dough into twelve triangles.

- Starting from the wide end, roll each triangle up until the tip just peaks out from underneath.

- Gently bend the ends inward to form a crescent shape.

- Repeat this process with the rest of the triangles, and place each of them on a greased or parchment lined baking sheet.
- Cover the rolls with a clean kitchen towel, and set a timer for one and a half hours, or note the time.
- Roll out, butter, cut, and roll up the remaining three portions of dough.
- Once an hour and a half has passed, preheat your oven to 375 degrees.
- When up to temperature, insert the first tray on the middle rack, and set the timer for 15 minutes.
- When time is up, remove the tray, brush each roll with melted butter, and move them to a wire resting rack.
- We like to sprinkle a little extra salt on top as well, but that’s your call.
- Repeat this process for the remaining three trays; as long as the oven is up to temp, they can go right in one after another.
- Enjoy warm. Or, allow to cool completely, and store in an airtight container or bag.
["Ingredients
- 3 Cups (300g, 10.6oz) Kernza Flour
- 3 Cups (420g, 14.8oz.) all purpose flour
- ½ Cup (105g, 3.7oz.) sugar
- 2 Sticks (1 Cup) unsalted butter
- 2 Cups (480g, 17oz.) room temperature water
- 2 Tsp (11.25g, 0.4oz.) salt
- 1 Packet (2 ¼ Tsp, 7g, 0.25oz.) dry yeast
Equipment
- Mixing bowls
- Rolling pin
- Knife
- Pastry brush
- Small sauce pot
- Whisk
- 4 13”x18” sheet pans
- Wire resting rack
-
 Pumpkin Pie with Kernza® CrustNov 03, 2020 | Joe KaplanPiesThis pumpkin pie filling is straightforward and bakes wonderfully. If you are able to blind bake (pre-bake) the crust a day ahead of time, it’ll be smooth sailing. The number of ingredients that pair well with Kernza continues to grow, and now we can officially add pumpkin to that list!
This pumpkin pie filling is straightforward and bakes wonderfully. If you are able to blind bake (pre-bake) the crust a day ahead of time, it’ll be smooth sailing. The number of ingredients that pair well with Kernza continues to grow, and now we can officially add pumpkin to that list!
Make ahead of time! For best results we recommend making the crust the day before. Use our Kernza Pie Crust recipe – “Single Crust”.Method
- Roll out one pie dough.
- Flour your counter, the top of the dough, and your rolling pin with all purpose flour.
- Begin rolling toward you from the middle of the dough.
- Rotate the dough slightly (about 1/8th), and roll toward you again.
- Repeat this process until the dough expands roughly one inch past a nine inch pie dish the entire way around.
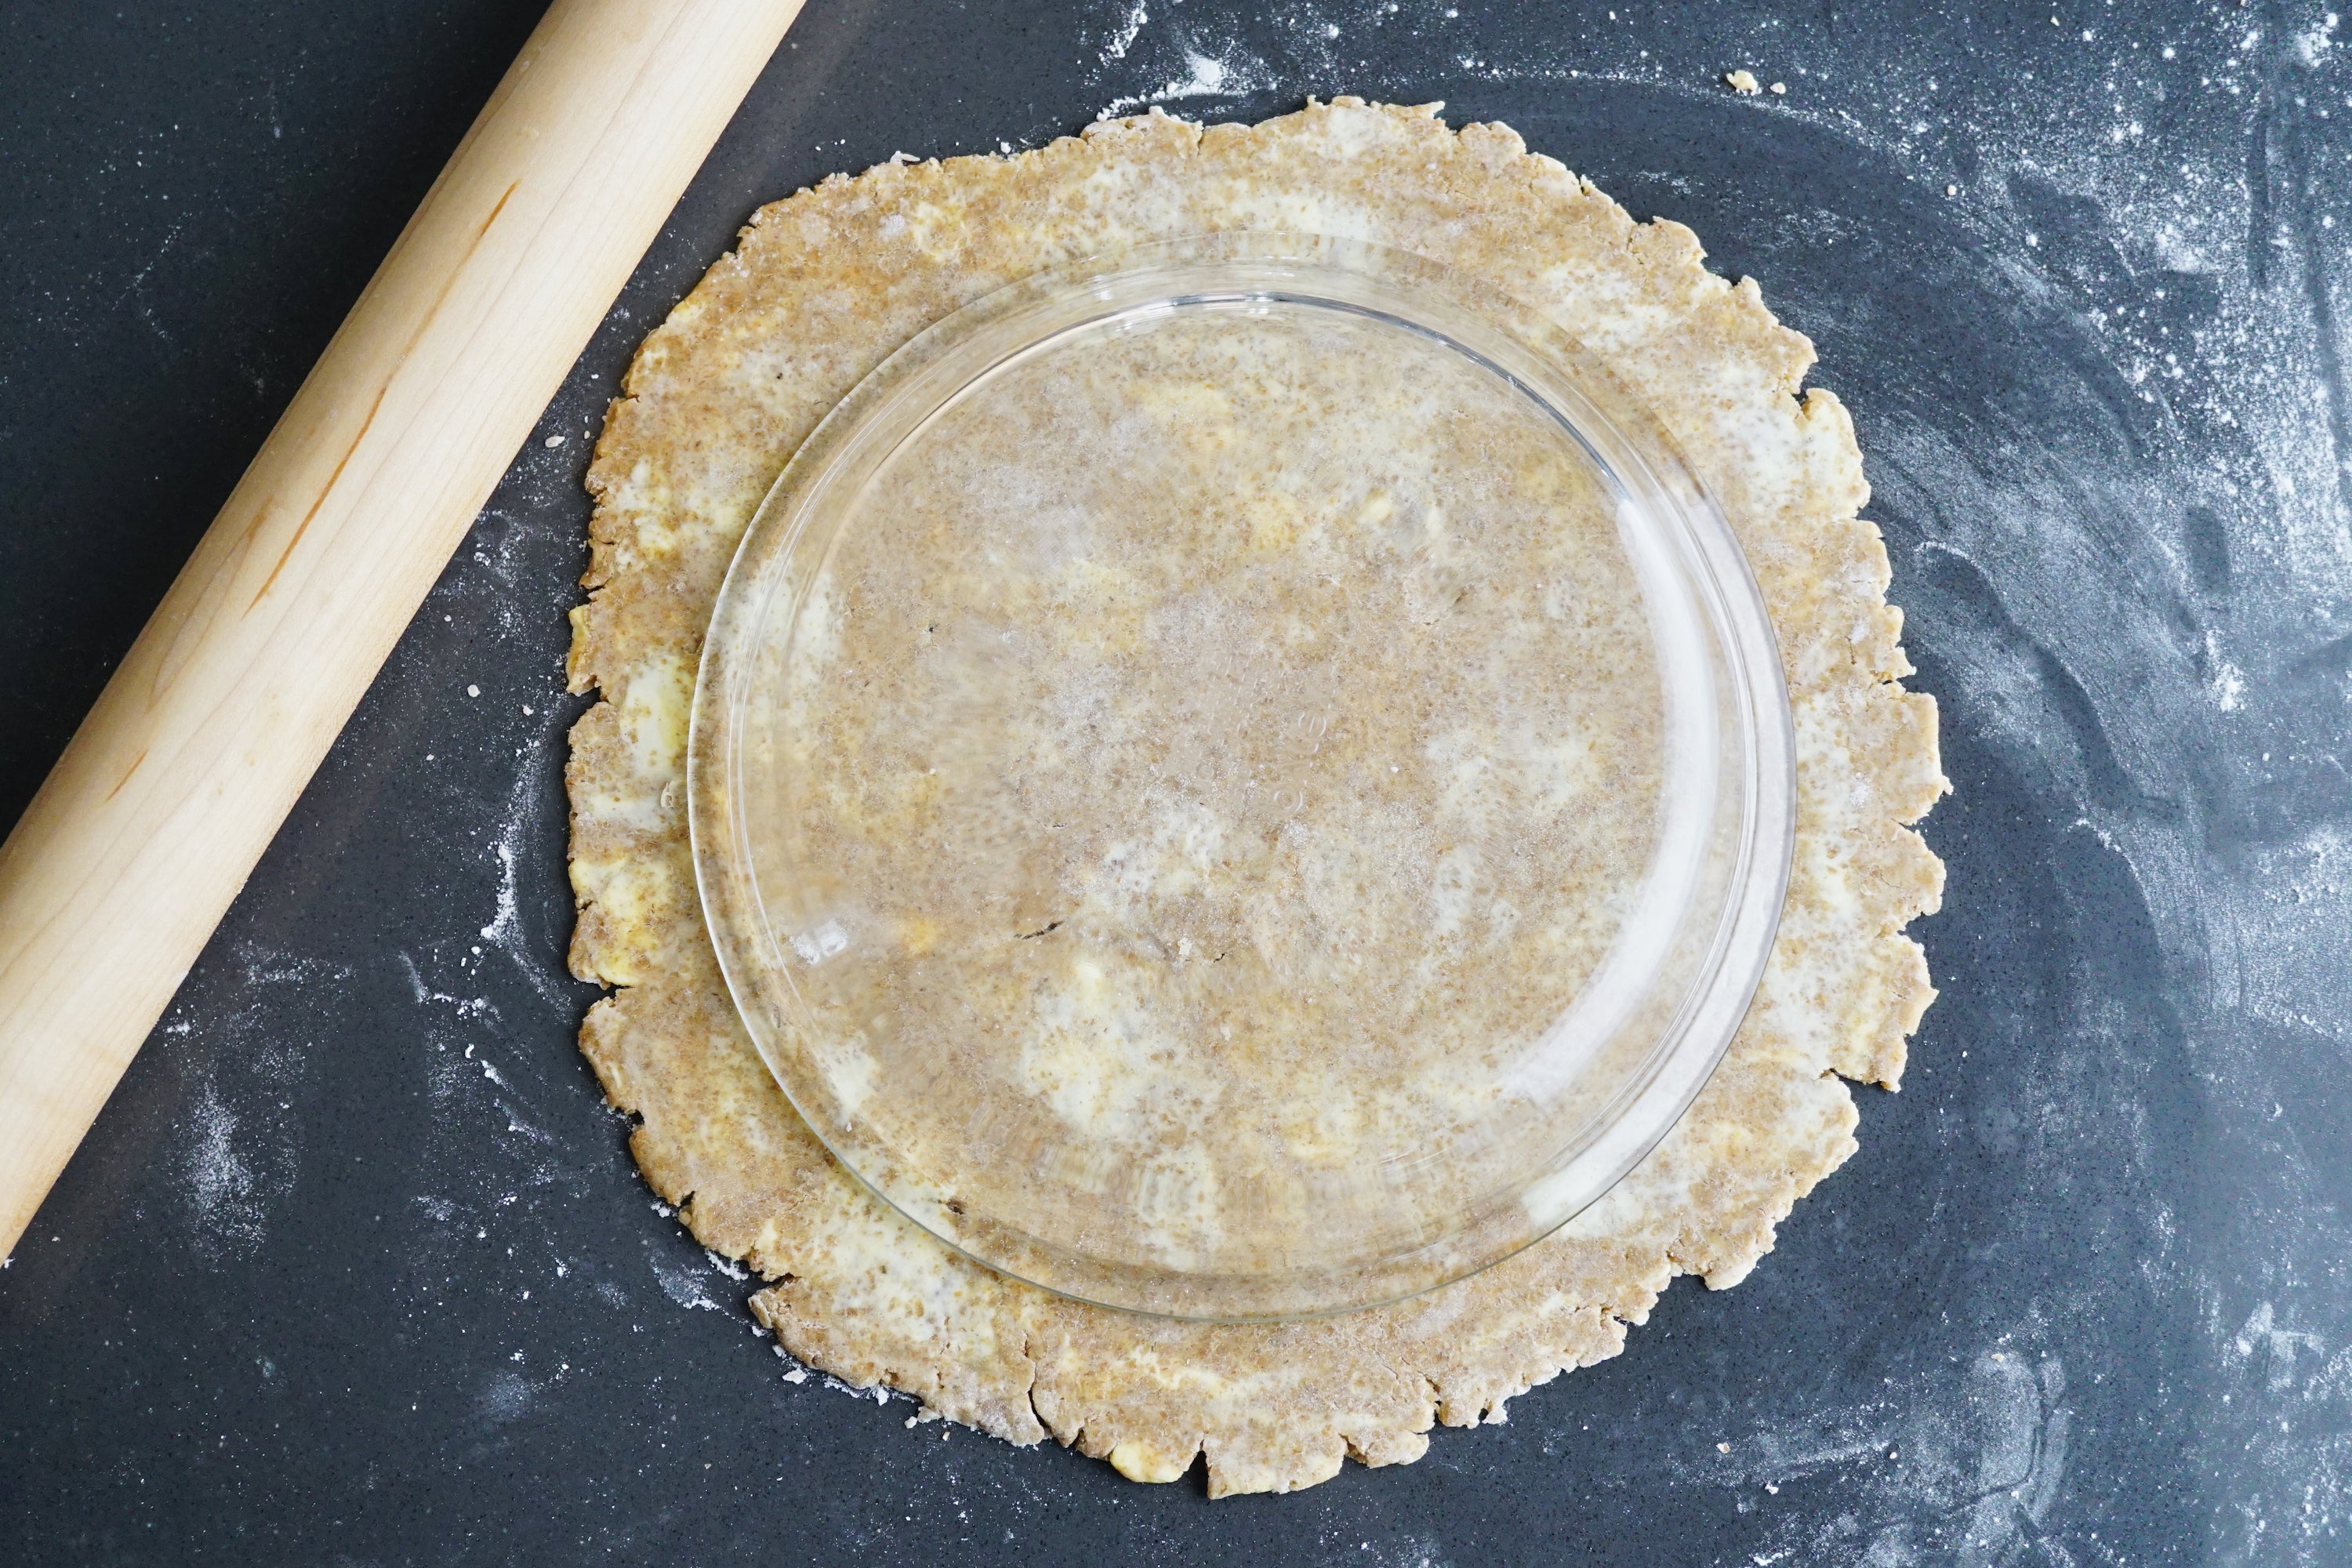
The dough may split in some areas, don’t hesitate to press it together with your fingers. Do this early on, and it will minimize splitting as you roll. - If the dough sticks to the counter, just lay down a little more flour.
- Once the dough is the appropriate size, wrap it around your rolling pin.
- Start from the top of the sheet, and bring the dough up and over the rolling pin towards you.
- Begin rolling your pin towards you until the dough has wrapped around it completely.

- With your pie dish in front of you, pick up your rolling pin and, moving away from you, unroll the dough over and on to the pie dish. Insert Photo: Roll Out
- When the dough is in the dish, tuck it down to the bottom by lifting an edge and gently pressing down. Do this all the way around the pie until the entire inside of the dish is in contact with dough.

- Place the dish in the fridge for 30 minutes, or the freezer for at least 10 minutes.
- Preheat your oven to 400 degrees.
- Remove the pie dish from the fridge, and trim the excess dough around the rim leaving a ½ of overhang.
- Tuck the overhanging dough underneath itself so it is resting on the ridge of the pie dish.
- Crimp the edge of the pie. If you are unfamiliar with crimping techniques, use a fork to seal the ridge of the dough to the rim of the pie dish, or head over to YouTube.
- Once crimped, lightly press the bottom of the crust to ensure the entire thing is in contact with the inside of the pie dish.
- Place the dough in the fridge (30 minutes) or freezer (10 minutes) one more time.
- When time is up, remove the dish, and score the bottom surface of the dough with a fork.

- Place a layer of parchment paper inside of the pie dish, and add your pie weights.
- Be sure to move the weights around and make folds in the parchment to ensure there are no open areas: Everything should be touching dough (the crimped edge can be exposed).

- Once your oven has preheated, Insert the pie crust (weight included) on a lower rack.
- Set a timer for 15 minutes
- When time is up, remove the pie weight, and place the crust back in the oven for another 7 minutes.
- Take the crust out of the oven, and brush the bottom with your whisked egg
- Act as though you are filling in the holes made by the fork, and brush the egg mixture ¾ up the side of the crust.
- You won’t need to use the entire egg. Once one even layer has been applied, that’s enough.
- Rest the crust until it is completely cool: 1-2 hours up to overnight.
- In a mixing bowl, combine flour, sugar, cinnamon, allspice, clove, nutmeg, and salt. Mix well, and break up any larger chunks.
- In a separate bowl, combine pumpkin puree, dulce de leche, milk, orange zest, and vanilla extract
- Whisk vigorously until the small bits of dulce de leche have dissolved, and the mixture looks homogenous.
- Add the flour mixture to the pumpkin mixture, and whisk until everything is well incorporated. Leave at room temperature.
- If making filling ahead of time, remove it from the fridge for about an hour to allow it to warm up.
- Preheat your oven to 375 degrees
- Once preheated, pour the filling into the crust, and gently shake/twist the pie until the filling has evened out.
- Brush the crimped edge with a layer of egg wash
- Place the pie in the oven on a lower rack, and bake for 45 minutes, rotating 180 degrees halfway through.
- When finished, the center of the pie should jiggle very slightly or hardly at all.
- Allow the pie to cool for at least an hour. Ideally, you should be able to hold it comfortably in the palm of your hand before slicing into it.
Ingredients
- "Single Crust" - Kernza Pie Crust
- One 15oz. Can (425g) Pumpkin Puree
- ½ Cup (190g, 6.7oz.) Dulce de Leche
- ¾ Cup (190g, 6.7oz.) Whole milk
- ½ Tsp (2g, 0.07oz.) Orange Zest
- ½ Tsp (2g, 0.07oz.) Vanilla extract - or half of one vanilla bean
- ¼ Tsp each of: Ground cinnamon, clove, allspice, and nutmeg
- Or substitute with pumpkin pie spice mix.
- 1.5 Tsp (8g, 0.28oz.) Salt
- ½ Cup (108g, 3.8oz.) Granulated sugar
- ½ Cup (70g, 2.45oz.) All purpose flour
- 1 Egg - Whisked
Equipment
- One 9” pie dish (glass or ceramic)
- Rolling pin
- Fork
- Mixing bowls
- Whisk
- Pastry brush (for egg wash)
- Parchment paper
- Pie weights. Anything from dried rice or beans, to pennies, and even ceramic pie weights work. Use enough to fill the dish.
-
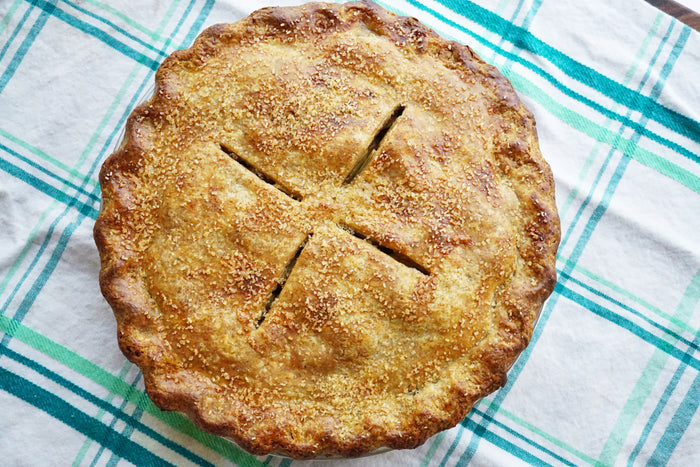 Apple Pie with Kernza® CrustNov 02, 2020 | Joe KaplanPies
Warming spices, brown sugar, and sherry make this apple pie perfect with our Kernza pie crust. Pro tip: Enjoy a glass of sherry alongside your slice!
Warming spices, brown sugar, and sherry make this apple pie perfect with our Kernza pie crust. Pro tip: Enjoy a glass of sherry alongside your slice!
Make ahead of time! For best results we recommend making the crust the day before. Use our Kernza Pie Crust recipe – “Double Crust”.Method
- Roll out one pie dough - This will be the bottom.
- Flour your counter, the top of the dough, and your rolling pin with all purpose flour.
- Begin rolling toward you from the middle of the dough.
- Rotate the dough slightly (about 1/8th), and roll toward you again.
- Repeat this process until the dough expands roughly one inch past a nine inch pie dish the entire way around.
The dough may split in some areas, don’t hesitate to press it together with your fingers. Do this early on, and it will minimize splitting as you roll. - If the dough sticks to the counter, just lay down a little more flour.
- Once the dough is the appropriate size, wrap it around your rolling pin.
- Start from the top of the sheet, and bring the dough up and over the rolling pin towards you.
- Begin rolling your pin towards you until the dough has wrapped around it completely.
- With your pie dish in front of you, pick up your rolling pin and, moving away from you, unroll the dough over and on to the pie dish.

- When the dough is in the dish, tuck it down to the bottom by lifting an edge and gently pressing down. Do this all the way around the pie until the entire inside of the dish is in contact with dough.
- Place the dish in the fridge.
- Peel the apples, slice each one into quarters, and remove the core.
- Slice each quarter lengthwise into thin slices - Make about five to six cuts per quarter.
- Place the apple slices in a large mixing bowl.
- In a separate bowl, combine your flour, brown sugar, salt, cinnamon, clove, and allspice.
- Mix thoroughly until larger clumps have disappeared.
- In another container, combine the sherry, lemon juice/zest, and vanilla extract. Whisk.
- Add the flour mixture to the apples, and mix until each slice is coated.
- Add the sherry mixture to the apples and mix again.
- Place the apples in the fridge.
- Roll out your second pie dough using the same process as the first.
- Take your pie dish (with the dough) and apples out of the fridge, give your apples one last stir, and begin adding them to the pie pan.

- Try to build one layer at a time by laying the slices flat in a circular pattern. This will minimize open spaces in the pie and help to prevent the top crust from falling during the bake.
- Once all of the apples are in the dish, roll the other dough sheet over them using the technique in step 2.
- Before trimming the excess dough hanging over the pie dish, gently press the top and bottom layers together with your fingers.
- Use a scissors to trim the excess dough leaving a ½ inch of overhang around the entire dish.
- Tuck the overhanging dough underneath itself so it is resting on the edge of the dish.


- Crimp the edge of the pie. If you are unfamiliar with crimping techniques, use a fork to seal the ridge of the dough to the rim of the pie dish, or head over to YouTube.
- Brush the top of the pie (including the crimped area) with a whisked egg.
- Sprinkle demerara sugar over the entire pie.
- With a knife, make four “vents” in the top of the pie by slicing into the crust. Cut into some apples, it’s fine.

- Move the pie to the fridge, and set the oven to 425 degrees. When the oven has preheated, the pie can go straight in.
- Bake the pie on a lower rack for 40-45 minutes, rotating it 180 degrees halfway through.
- Rest it out of the oven for at least an hour and a half, or until you can comfortably hold it in the palm of your hand.
Ingredients
- “Double Crust” Batch of Kernza Pie Crust
- 6 Apples. We used Harleson, Honeycrisp, and Sweet Tangos, but you can use whatever you prefer!
- ¼ Cup (35g, 1.2345oz.) All Purpose Flour
- ½ Tsp (1g, 0.05oz.) Ground cinnamon
- ¼ Tsp (1g, 0.05oz.) Ground Allspice
- ¼ Tsp (1g, 0.05oz.) Ground Clove
- 1.5 Tsp (8g, 0.28oz.) Salt
- ⅓ Cup (73g, 2.6oz.) Brown Sugar (light or dark)
- ¼ Cup (60g, 2.1oz.) Sherry. A little sweeter is better in this case; If you don’t know where to start, ask for “Pedro Ximenez” or, “PX” sherry. Rum and Calvados will work as substitutes, or just leave the booze out. That’s fine, too.
- 1.5 Tsp (6.66g, 0.23oz.) Lemon Juice
- 1 Tsp (About a ½ lemon) Lemon zest
- 1 Tsp (5g, 0.2oz.) Vanilla extract - or 1 vanilla bean
- 1 Egg - Whisked
Equipment
- 9” glass or ceramic pie dish
- Rolling pin
- Mixing bowls
- Bench scraper
- Knife
- Microplane (lemon zester)
- Peeler
- Whisk
-
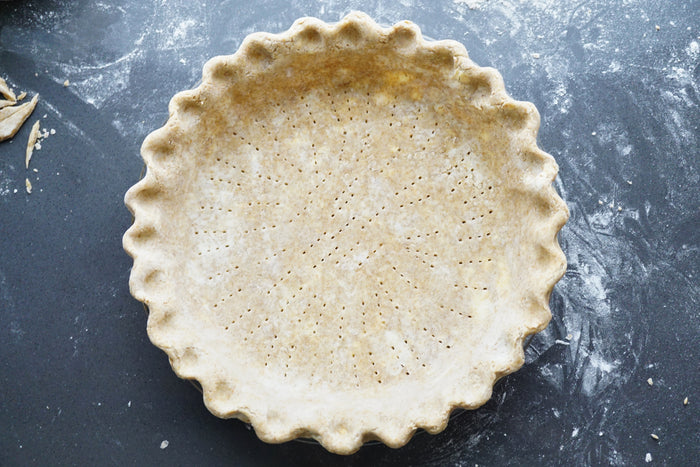 Kernza® Pie CrustNov 02, 2020 | Joe KaplanPiesJust in time for the holidays: A flaky pie crust that will work with any of your favorite fillings!
Just in time for the holidays: A flaky pie crust that will work with any of your favorite fillings!
Method
- Combine both flours, salt, and sugar in a bowl. Mix to combine
- Slice butter and shortening into cubes (aim for the size of two peas).

- Add butter and shortening to flour mixture and toss gently to coat each cube.
- “Squish” each cube with your fingers to form tiny flakes. Re-toss in flour as you go.

- Once the butter and shortening cubes have been flattened, use your palm or fist to press them into the flour (toss, press, repeat). About two minutes
- Eventually, the butter and shortening flakes will become much more distinguishable, and there will be significantly less unbuttered flour in the bowl.

- Once butter and flour are mixed well, add the ice water in two stages: Mixing and gently tossing between each addition.
- Gently toss and press the dough until it barely comes together into a weak ball.
- Turn the dough ball out onto a floured surface. (All purpose flour)

- Lightly dust the top with all purpose flour.
- Give your rolling pin a nice coat as well
- Gently pressing down on the dough, roll towards and away from you until it doubles in length.

- With your bench scraper, fold the dough sheet into thirds (pamphlet style)
- Rotate 90 degrees, and repeat the “roll and fold” in step 12.
- Gently shape the dough ball into the shape of a large hockey puck, wrap in plastic wrap, and store in the fridge for at least one hour. Overnight is preferred.
- The dough can also be stored in the freezer for a few months.
Notes
**For a double crust, repeat the process above. When finished, cut the dough ball in half with a bench scraper or knife. If you have a scale, weigh each half and adjust accordingly so they are equal in weight. If you do not have a scale, that’s alright; Make the half that looks a little larger your bottom crust, and the smaller of the two, your top crust.

Ingredients
Single Crust
- 3/4 Cup (105g, 3.7oz.) All Purpose Flour
- 3/4 Cup (75g, 2.65oz.) Kernza Flour
- 5 Tbsp (70g, 2.5oz.) Unsalted Butter (Chilled)
- 4 Tbsp (47g, 1.66oz.) Shortening (Chilled)
- 2 Tsp (9g, 0.3oz.) Sugar
- 1 Tsp (5g, 0.18oz.) Salt
- 1/3 Cup (75g, 2.65oz.) Ice Water
Double Crust
- 1 1/2 Cup (210g, 7.4oz.) All Purpose Flour
- 1 1/2 Cup (150g, 5.3oz.) Kernza Flour
- 10 Tbsp (140g, 5.0oz.) Unsalted Butter
- 8 Tbsp (94g, 3.32oz.) Shortening
- 4 Tsp (18g, 0.6oz.) Sugar
- 2 Tsp (10g, 0.35oz.) Salt
- 2/3 Cup (150g, 5.3oz.) Ice Water
Equipment
- Rolling Pin
- Bench Scraper
- Mixing bowl
- Knife
-
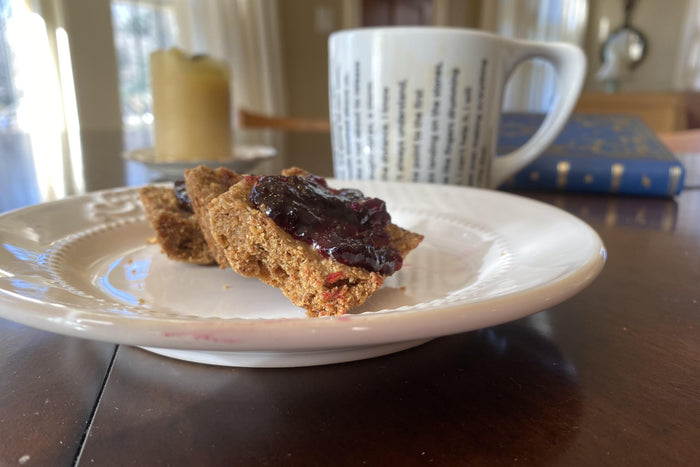 Kernza® ShortbreadNov 01, 2020 | Beth DooleyCookiesThe butter and maple give these Kernza shortbread a rich crumb and graham flavor. You can substitute light brown sugar for the maple sugar here.
The butter and maple give these Kernza shortbread a rich crumb and graham flavor. You can substitute light brown sugar for the maple sugar here.
Instructions
Brush an 8-inch square pan with butter. In a bowl, whisk together the butter with the sugar, vanilla and salt. Stir in the flour until combined.
Press the dough into the pan and chill in the refrigerator for at least an hour or overnight.
Preheat the oven to 300 degrees F. Line a baking sheet with parchment paper. Sprinkle maple sugar over the top of the dough. Bake until golden, about 45 minutes. Remove from the oven, allow the pan to cool slightly, then invert the pan onto a cutting board to remove the cookies. Cut into rectangles and transfer to the cookie sheet. Return to the oven and bake until crisp, about 15 to 20 minutes. Cool completely before serving.Ingredients
- 2/3 cups (11 tablespoons) unsalted butter, melted, plus more for brushing
- ¼ cup maple sugar (can substitute brown sugar 1:1), plus more for garnish
- 1 teaspoon vanilla
- ¼ teaspoon salt
- 1-1/2 cups Kernza Flour
-
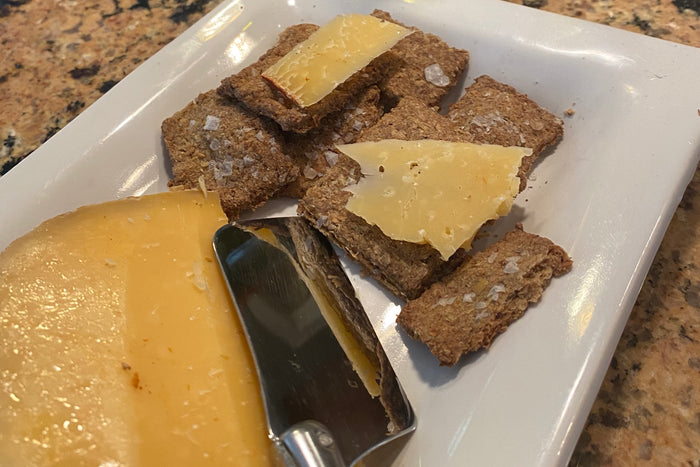 Kernza® CrackersNov 01, 2020 | Beth DooleyCrackersMaking crackers is easier than you think! This basic recipe is open to all sorts of variations. Use can add chopped fresh herbs or spices or create sweet versions by toping with a sprinkling of cinnamon sugar. Serve with sharp cheese or jam.
Making crackers is easier than you think! This basic recipe is open to all sorts of variations. Use can add chopped fresh herbs or spices or create sweet versions by toping with a sprinkling of cinnamon sugar. Serve with sharp cheese or jam.
Instructions
Preheat the oven to 400 degrees F. In a food processor fitted with a steel blade, process the flour and salt. Pulse in the butter until blended, about 20 seconds to 1 minute. Add the water and pulse until you have a crumbly dough that holds together. If the dough is too dry, add a little more water a tablespoon at a time. If it’s too wet, work in a little more flour.
Gather the dough into a ball and turn out onto a lightly floured surface. Using a lightly floured rolling pin, roll the dough into a rectangle that’s about ¼ inch thick (or thinner). Using a sharp knife, score the dough into 3-inch squares and set on a lightly floured baking sheet. Bake the crackers until browned, about 10 minutes. Cool on a rack. Store in an airtight container.Ingredients
- 1 cup Kernza Flour
- ½ teaspoon salt
- 2 tablespoons unsalted butter
- About ¼ cup water
- ½ teaspoon coarse salt to finish
-
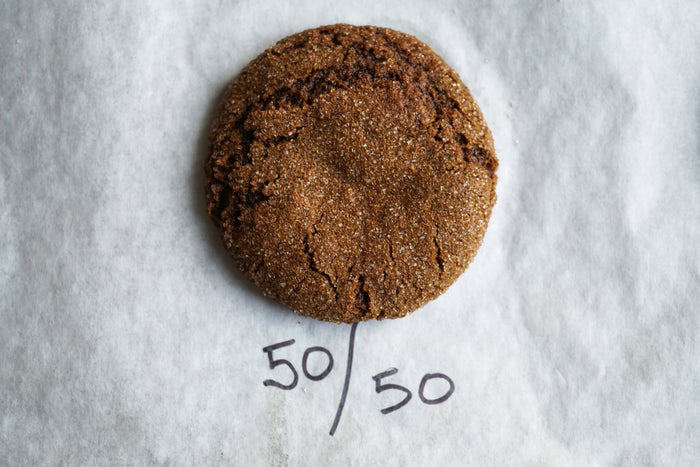 Chewy Molasses Kernza® CookiesOct 21, 2020 | Joe KaplanCookiesThis molasses cookie recipe from Bon Appetit makes delicious, chewy and fluffy molasses cookies. Their texture, rise, and overall appearance make them a great control for our experiment.
This molasses cookie recipe from Bon Appetit makes delicious, chewy and fluffy molasses cookies. This recipe, which substitutes 50% of the all-purpose flour with Kernza, was featured in our recipe trial Substituting Kernza for All Purpose Flour.
Recipe Preparation
Place racks in lower and upper thirds of oven; preheat to 375°. Whisk flour, baking soda, cinnamon, ginger, cardamom, and salt in a small bowl. Whisk egg, butter, granulated sugar, molasses, and brown sugar in a medium bowl. Mix in dry ingredients just to combine.
Place sanding sugar in a shallow bowl. Scoop out dough by the tablespoonful and roll into balls (if dough is sticky, chill 20 minutes). Roll in sugar and place on 2 parchment-lined baking sheets, spacing 2” apart.
Bake cookies, rotating baking sheets halfway through, until cookies are puffed, cracked, and just set around edges (overbaked cookies won’t be chewy), 8–10 minutes. Transfer to wire racks and let cool.Ingredients
- 2 cups (275g., 9.7oz.) all-purpose flour
* If substituting Kernza: 1 Cup (135g., 4.8oz) all-purpose flour, and 1 Cup (100g, 3.5oz.) Kernza Flour - 2 teaspoons (12g., 0.4oz.) baking soda
- 1½ teaspoon (2g., 0.05oz.) ground cinnamon
- 1 teaspoon (2g., 0.05oz.) ground ginger
- ¾ teaspoon (roughly 1g., 0.03oz) ground cardamom
- ½ teaspoon (4g., 0.15oz.) kosher salt
- 1 large egg (roughly 50g., 1.8oz.)
- ½ cup (1 stick, 113g., 4oz.) unsalted butter, melted
- ⅓ cup (70g., 2.5oz.) granulated sugar
- ⅓ cup (120g., 4.2oz.) mild-flavored (light) or robust-flavored (dark) molasses
- ¼ cup (54g., 1.9oz.) (packed) dark brown sugar
- Coarse sanding or raw sugar (for rolling)
- 2 cups (275g., 9.7oz.) all-purpose flour
-
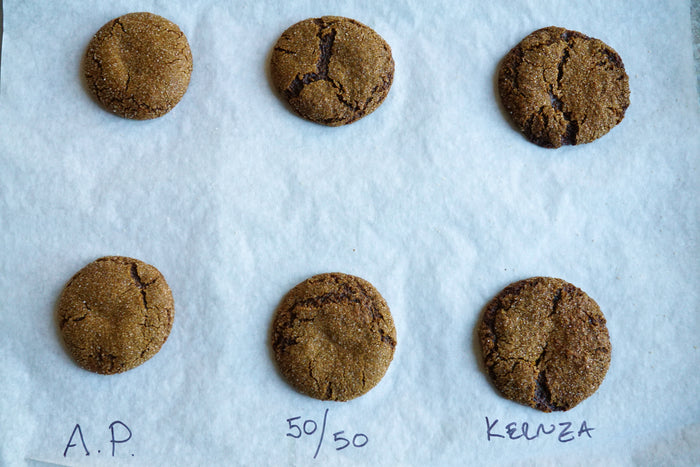 Substituting Kernza® for All-Purpose FlourOct 21, 2020 | Joe KaplanCookies, Essentials
We recently had a comment asking about the potential for substituting Kernza in a recipe (more specifically a cookie recipe) that calls for all purpose flour. Though our experience with Kernza flour has revealed properties quite different than refined or all purpose flour, we decided to test exactly how much you can get away with when subbing in Kernza. Hopefully this narrows down some of the guesswork involved in getting started with our flour. This one’s for you, Lane!
This molasses cookie recipe from Bon Appetit makes delicious, chewy and fluffy molasses cookies. Their texture, rise, and overall appearance make them a great control for our experiment.
Looking for the recipe? Here is the Chewy Molasses Kernza Cookies recipe we used in this article.
We recently had a comment asking about the potential for substituting Kernza in a recipe (more specifically a cookie recipe) that calls for all purpose flour. Though our experience with Kernza flour has revealed properties quite different than refined or all purpose flour, we decided to test exactly how much you can get away with when subbing in Kernza. Hopefully this narrows down some of the guesswork involved in getting started with our flour. This one’s for you, Lane!
This molasses cookie recipe from Bon Appetit makes delicious, chewy and fluffy molasses cookies. Their texture, rise, and overall appearance make them a great control for our experiment. You can find the winning version of the recipe in our Chewy Molasses Kernza Cookies recipe post.
The Experiment
We made three batches of cookies: Our control was Bon Appetit’s recipe, unchanged, using 100% all purpose flour. The second batch comprised of equal portions by volume of Kernza and A.P., and the final batch was made entirely with Kernza. Each of these doughs were baked twice; once while they were at room temperature, and once after they had a chance to cool in the fridge for twenty minutes.

Differences started to arise as early as the mixing phase; The dough changed from light and smooth (100% A.P.) to somewhat dense and coarse (100% Kernza). The 50/50 dough was somewhere in the middle (makes sense).

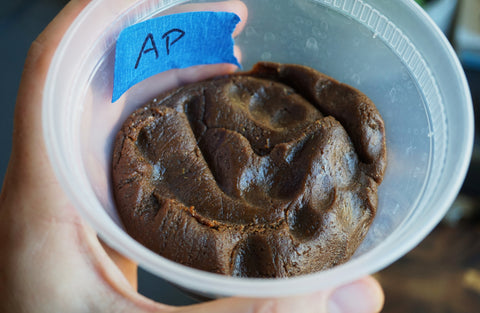


The first bake was done immediately after mixing, while the dough was at room temperature, and the results were somewhat expected. As you can see in the photos, the A.P. cookies had a good rise, and a nice chewy, fluffy texture on the inside. As more Kernza was introduced, these characteristics diminished. The 100% Kernza cookies were fairly flat, a little dense, and the texture from the bran was very apparent. However, the 50/50 batch turned out better than expected; there was a drop in the rise, but the inside texture remained pleasant and not too dense. Adding to this, the flavor difference was significantly more enjoyable when Kernza was included. It seemed to balance out each of the spices while contributing its own flavor.Results

Results: All-Purpose Flour


Results: 50/50 All-Purpose/Kernza


Results: 100% Kernza


Once the dough had a chance to cool, another batch of cookies were made. This time, the change in characteristics were much less noticeable; the cool dough was able to maintain more of its structure in the oven causing less of a flattening effect amongst the Kernza cookies.


The Takeaway
As one would expect, the shape and texture of these cookies were negatively affected by the addition of Kernza. On the other hand, the flavor showed a drastic improvement when Kernza was added to the mix. When baked cold from the fridge, the 50/50 dough was determined to be the best over all: The cookie rose significantly, the middle remained soft and somewhat light, and the flavor was unmatched.
This is only one recipe, but the results should correlate to innumerable baked goods. To better your odds, try starting with a 20% substitution when working with all purpose flour. The flavor will still come through! Additionally, should you prefer an even softer texture, try sifting out some of the bran before mixing the flour into the dough. We hope this helps! Be sure to try this recipe with Kernza and let us know what you think! You can find the resulting recipe here.
-
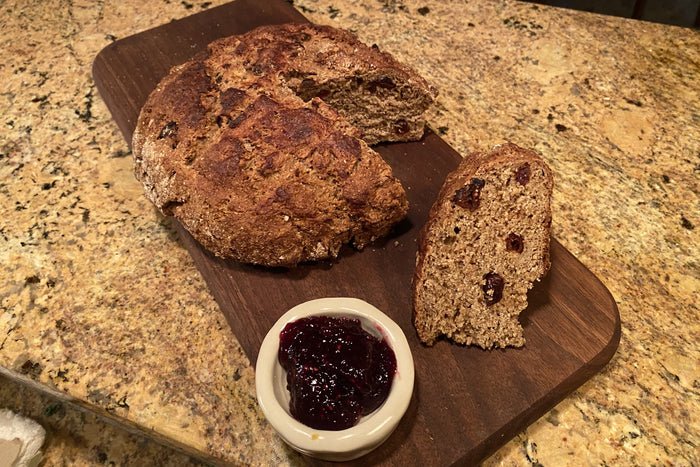 Kernza® Soda BreadOct 04, 2020 | Beth DooleyBread
Instructions
- Preheat the oven to 425 F (328 C).
- Lightly grease a baking sheet and dust with a little flour.
- In a large bowl, whisk together the flour, baking soda, and salt.
- In a separate bowl, whisk together the buttermilk, egg, and honey. Make a well in the center of the flour and pour in the buttermilk mixture. Using one hand or a large spoon, stir together in full circles starting in the center of the bowl and working towards the outside until all of the flour is incorporated.
Add a little more buttermilk if the dough seems too stiff, it should be soft but not too wet and sticky. - Turn the dough out onto a lightly floured surface. With floured hands, gently pat the dough into a round shape. Transfer the loaf to the prepared baking sheet. Mark a deep cross using a serrated knife and prick each of the four quadrants.
- Bake the bread for about 15 minutes then reduce the oven temperature to 400 F (204 C) and continue baking until the loaf is browned and sounds hollow when tapped, about 30 to 35 more minutes. Transfer the loaf to a wire rack to cool
Ingredients
- 2 cups Kernza Flour
- 1 teaspoon baking soda
- 1 teaspoon salt
- 2 cups buttermilk, or a bit more as needed
- 1 large egg
- 1 tablespoon honey
- ¼ cup dried cranberries or raisins
-
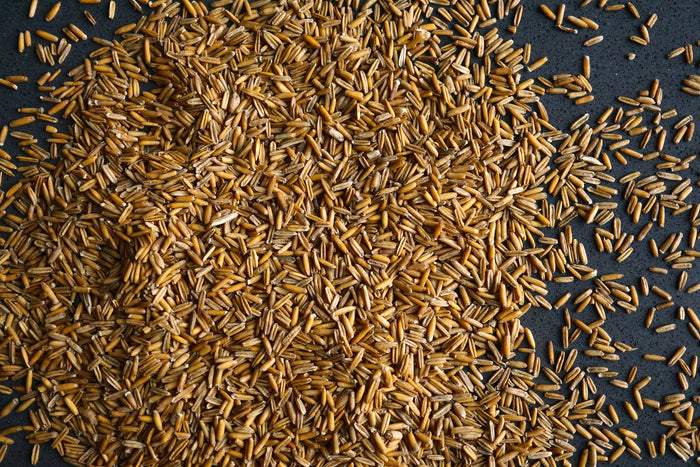 Getting Started With KernzaOct 03, 2020 | Joe KaplanEssentialsWhen it comes to Kernza, think flavor. It is one of the main reasons this particular wheat grass was selected for cultivation over 100 other perennial grains, so don’t worry too much about that perfect oven spring or open crumb. Though it will rise, it generally tends to favor going “out” instead of “up.” Focus instead on coaxing out its incredibly intricate flavor and aroma, and expressing it to the fullest extent! Hints of many ingredients have revealed themselves to us through tasting: toasted nuts, honey, brown sugar or maple, cinnamon, even raisin. The list goes on. Interestingly enough, this flavor profile will lead you in the proper direction when you start cooking with it. It almost tells you exactly what to bake. We’ll go into a little more depth below.
Using Kernza to its Full Potential
When it comes to Kernza, think flavor. It is one of the main reasons this particular wheat grass was selected for cultivation over 100 other perennial grains, so don’t worry too much about that perfect oven spring or open crumb. Though it will rise, it generally tends to favor going “out” instead of “up.” Focus instead on coaxing out its incredibly intricate flavor and aroma, and expressing it to the fullest extent! Hints of many ingredients have revealed themselves to us through tasting: toasted nuts, honey, brown sugar or maple, cinnamon, even raisin. The list goes on. Interestingly enough, this flavor profile will lead you in the proper direction when you start cooking with it. It almost tells you exactly what to bake. We’ll go into a little more depth below.
Getting Started
Kernza Flour
Kernza Flour is a fun addition to your baking arsenal. It can be used as a stand-alone ingredient, a substitution, or replace a certain amount of flour a given recipe calls for. As mentioned above, take note of the flavor and aroma. Additionally, consider the look and feel of our Kernza flour:

As you can see, Kernza flour is a bit more varied than your standard all-purpose white flour. We arrived at this grind after running a series of initial baking trials. The less refined nature of this flour is a main contributor to its nuanced flavor. It is a whole grain: bran, germ, and endosperm are all included. Look closely and you can see bits of the outer shell (bran), along with varying color shades of the flour itself. These are signs of great texture and a lot of subtle flavor. In the future, we intend on milling various grind sizes, but in the meantime, if you would like a finer or more coarse grind, look into milling our whole grains at home!
Cooking with Kernza Flour
As mentioned above, think flavor: cookies, pancakes, waffles, biscuits, denser loaves of bread, perhaps even muffins or cakes. The theme here is foods that can be sweet and savory with minimal rising. Pancakes with maple syrup are a great example, especially when you consider the fact that Kernza flour itself has notes of maple. Our Cornbread recipe is another example of a balance between sweet and savory.

Make these connections, and Kernza will set you right up for success! Of course, you are not limited to baked goods that need to be sweet and savory. This is just a flavor combination we think brings out the best of Kernza, and it is a great starting point! You cannot go wrong if you follow the flavor! There are wonderful recipes in our Perennial Test Kitchen and many fantastic community contributions in our Community Recipes blog. Start there!Using Kernza Flour as a Substitution for Wheat
Try substituting in recipes that utilize whole wheat flour. The baking properties are somewhat comparable, and there has been success using Kernza as a 1 to 1 substitute for whole wheat. That being said, you may need to add a little more water depending on the recipe and substitution; Kernza is very “thirsty.” This, in part, is due to the presence of all components (bran, germ, endosperm) in the flour. They each compete for water absorption (especially the bran), so it’s totally normal to adjust water content accordingly. We also suspect (as we have yet to test this ourselves) recipes using soft wheat (as opposed to hard wheat which is ideal for those “springy” bread loaves) and cake flour will also lend well to a Kernza substitution. These baked goods might again include cookies, cakes, biscuits, as well as tortillas, pitas, and other flat breads.
Additionally, there has been success with a small addition of kernza into recipes that do not require whole wheat or soft wheat flour. If trying something like this, start small; take away about 10-15% of the flour called for in the recipe, and add it back with Kernza flour. The exact results will not quite be attained, but it will be fairly close in most cases. The flavor change, however, will be noticeable! Recipes that call for commercial yeast will be the most forgiving in this case.
Kernza Whole Grain

Your grain may contain small traces of wheat or other grains. Do not be alarmed! This is a byproduct of a Kernza as a new grain. Perennial Pantry is actively working to reduce this imperfection, but for now it is just a fun “bonus”. Your cooking will not be affected!

Cooking with Kernza Grain
For a good place to start, head to the “How to Par-Cook Kernza” post. Here you’ll find a straightforward method to cook the grain both on the stove top, or in a pressure cooker (in this case we used an Instapot). These methods are meant to provide you with a neutrally flavored cooked grain that you can flavor any way you’d like, making it much easier to substitute in or add Kernza to recipes you may already have on hand. You can even experiment with adding flavors straight into the cooking method. For example: Use chicken or vegetable stock instead of water, and throw in some chopped onion, garlic and herbs.
Substitutions and Additions
Kernza is incredibly versatile when it comes to adding or substituting. Recipes that utilize brown rices or ancient grains like farro will work very well, because their flavor tends to be more complex, like Kernza. Through our experience, certain warm spices like clove, allspice, nutmeg, and cinnamon pair exceptionally well with Kernza’s flavor profile. However, by no means are these spices the only ones you can pair with Kernza. They are just a few of our favorites. Our Middle East Inspired whole grain recipe utilizes a few of these spices.
Wild rice recipes may also be a good starting point particularly in Minnesota where everyone is a few degrees of separation away from a wild rice recipe. We have not tried yet, but suspect that kernza will pair wonderfully with wild rice and could even replace it in a recipe. Their cooking methods are also similar!
We hope this along with our recipes will make getting started with Kernza an enjoyable experience. Please continue letting us know if you would like to see any other cooking methods, or have any questions. We would also love to see any suggestions on what recipes we should develop next. Have fun!
Citizen Science
To grow as a new food crop, Kernza® perennial grain needs ongoing research and development. Through a partnership with The Land Institute, The University of Minnesota Forever Green Initiative, and the Artisan Grain Collaborative, we are excited to invite you to participate in culinary research through a new Citizen Science Experiment. Your baking experience can help us understand why and how people use Kernza® flour—and the delicious results that are possible!
Share recipes with others on the Cooking with Kernza® Facebook Group.
Learn more about Kernza®
-
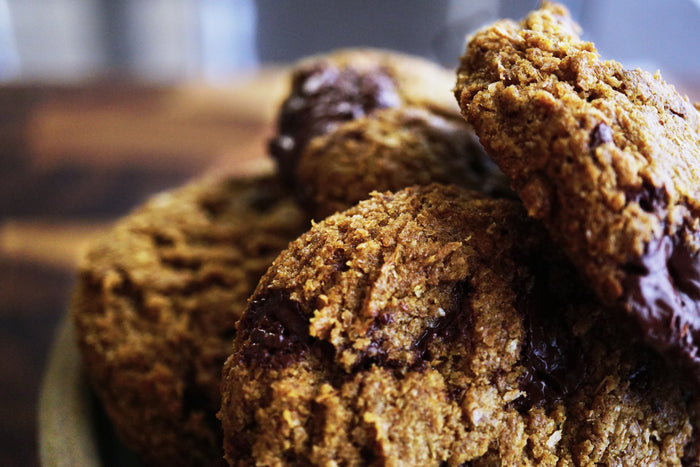 Kernza® Chocolate Chip CookiesOct 03, 2020 | Christopher AbbottCookiesKernza, brown butter, and dark chocolate, an awesome combination that allows the intricate flavor of Kernza to come out on top. Enjoy!
Kernza, brown butter, and dark chocolate, an awesome combination that allows the intricate flavor of Kernza to come out on top. Enjoy!
-
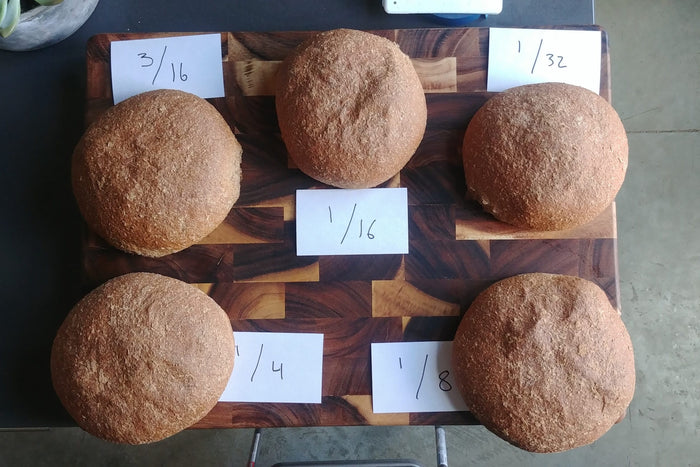 Leavened Test BakeSep 03, 2020 | Joe KaplanBread, Essentials
Looking for the recipe? Here is the Kernza Bread Recipe we used in this article.
When it comes to baking, consistency can prove to be quite the challenge considering the seemingly infinite number of variables one has to consider: Things such as room temperature and humidity, water temperature, proofing time, even inconsistencies from one oven to the next, all affect the outcome of your loaves, or “boules.” Many standard flours such as All Purpose or Bread Flours have been used enough by professionals and home cooks alike, that one can determine relatively quickly what needs to be done in order for their full potential to come through. Kernza, on the other hand, has yet to stand the test of time. There is no “catalogue of standards” so to speak, on the cooking properties of this wonderful perennial grain. Therefore, there are a myriad of opportunities for experimentation! The purpose of this test, and the many tests to follow, is to contribute one piece of the puzzle at a time to the collective knowledge surrounding Kerna and its application in the culinary arts.
So... our first experiment, and first contribution to the puzzle: How coarse should your flour be? Now, there is a lot of literature out there in reference to this sort of thing, but the majority of it is in regard to more common flours: A.P., Bread, Cake, etc. Our goal was to see if these standards hold true to Kernza flour, and in the process, dial in our own milling standards at the Pantry. With this experiment, we are testing the general baking properties of Kernza flour milled to five different particle sizes. How did we determine our particle size? Simply by turning our mill adjustment dial clockwise to a number of five predetermined distances: the greater the turn, the farther apart the milling stones are, and the coarser the grind. Our “turns” ranged from 1/8th of a turn (coarse) to 1/32 of a turn (very fine). This gave us flours somewhere between 00 and semolina. All in, we had five different coarseness levels to play around with measured by turn distance. They were ⅛, ¼, 3/16, 1/16, and 1/32.
Alright. What to bake? Fortunately we have a few tried and true recipes from our friend and cookbook author, Beth Dooley, that were perfect for this sort of experiment. We went with her Kernza Bread recipe: a yeasted loaf that incorporates an addition of whole wheat flour. This recipe contains all of the steps necessary for a classic bread loaf, making it ideal to determine any inconsistencies in each step of the process. The recipe is posted.
The Experiment
As one can see, each loaf was relatively similar. However, a few key differences emerged throughout the process:
Mixing: When combining the flour and wet components of the dough, we noticed a clear divide between the three coarsest flours (1/8th, 1/4th, 3/16th) and the two finest (1/16, 1/32). The coarse flours were “less thirsty.” In other words, they struggled when it came to absorbing moisture. As a result, the dough did not reflect the guidelines of Beth’s recipe: In the mixing phase, one needs to add flour, up to a certain amount, until the dough becomes “too hard to stir.” Because the coarser flours struggled to absorb liquid and hydrate, the dough remained loose and, and very tacky. The finer flours, however, did not need extra flour to mimic the properties of the recipe; the dough came together very easily.


Kneading: Similar obstacles also came to light during the kneading phase. To remain true to the recipe, the dough was never kneaded past 10 minutes, and in that time, once again, the three course doughs never achieved the smooth and less tacky dough structure the recipe called for. In fact, the two most coarse flours required a substantial amount of added flour in order for the dough to form any structure whatsoever. As you may have guessed, the finer flours were able to do this.


Proofing: This phase saw the least deviation across each sample; each loaf was able to proof to twice its size. The only variation revealed itself when the coarse loaves spread out laterally a little more than the fine flours. It should be noted that this variation was miniscule and difficult to detect in the end product.


Tasting: When it finally came to tasting each sample, there seemed to be two prominent characteristics that had an inverse relationship to each other: dryness, and crumb density. As the samples increased in fineness (smaller particle size), the loaves became increasingly more dense and less dry. The “¼” loaf was almost too dry, but the crumb was soft, light, and a little crumbly. On the other end of the spectrum, the “1/32” loaf was very toothy and dense, yet moist. Too much of either of these two characteristics were considered unpleasant. Therefore, it is no surprise that the “3/16” and “1/16” loaves were determined to be of the highest quality, as they had an exceptional mix of moisture retention and crumb density!


Issues: As seen in the photos, the “1/16” and “1/32” loaves haven an interesting crumb. It looks as though the crumb itself separated from the crust. This is known to be a phenomenon called “flying crust,” and it could be a sign of over proofing. When a dough is over proofed, excess gas builds up inside of the loaf, so much so that it can no longer be contained. During the bake, this gas leeches out of the crumb and gets trapped under the crust revealing a separation. With this in mind, a second test was performed to eliminate potential proofing inconsistencies. This time, however, only the “3/16,” “1/16,” and “1/32” flours were tested as they had the most desirable traits. The second trial was a success! Each loaf proofed correctly, and the results were noted.
Final conclusion: In the end, the winner was a close call. Again, the “3/16” and “1/16” loaves had the most desirable characteristics: Pleasant crumb density and moisture content. Those two components paired with the delightful aroma and flavor of Kernza yielded an amazing loaf of bread! The deciding factor eventually came down to which dough best mimicked the steps of the recipe, and that dough was the “1/16” grind. With this flour, each step matched very well according to Beth’s process, and the end result was a very pleasant eating experience!
-
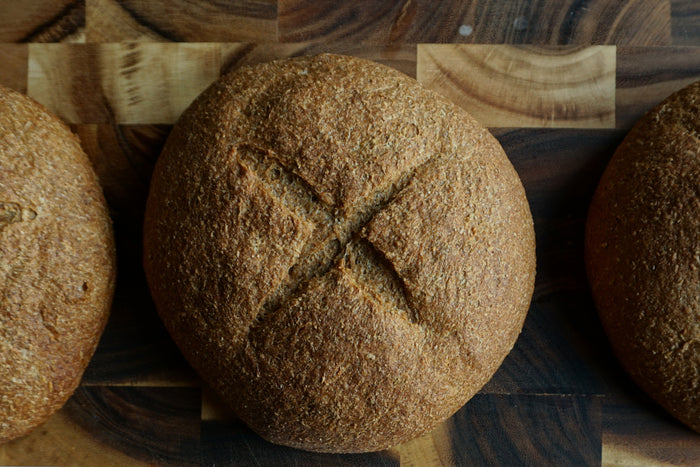 Beth Dooley's Kernza® BreadAug 29, 2020 | Joe KaplanBread
Method
- In a large bowl, dissolve the yeast in ½ cup of the warm water. Stir in the remaining water, honey, salt and oil. Stir in the Kernza flour and then add the wheat flour, cup by cup until the dough becomes too hard to stir.
- Dust a work surface with the wheat flour and turn out the dough onto the prepared surface and knead the dough until it becomes smooth and loses some of its tackiness, about 8 to 10 minutes. Turn the dough into a greased bowl and cover with a clean kitchen towel. Let the dough rise until double in volume, about 2 hours.
- Punch the dough down, then shape it into two round 8-inch loaves and place on a greased baking sheet. Cover the loaves with a clean kitchen towel and let rise until the dough nearly doubles in size, about 1 hour. Preheat the oven to 350 F.
- Bake off the loaves until they sound hollow when tapped, about 45 mins.
Ingredients
- 1Tbsp. active dry yeast
- 2 ½ cups warm water
- 3 Tbsp. honey
- 1 Tbsp. coarse salt
- 2 Tbsp. hazelnut oil
- 2 cups Kernza flour
- 3 to 4 cups whole wheat flour
Equipment Needed
- Mixing Bowl
- Rubber Spatula
- Bench Scraper
- Medium Sheet Pan
- Resting Rack
-
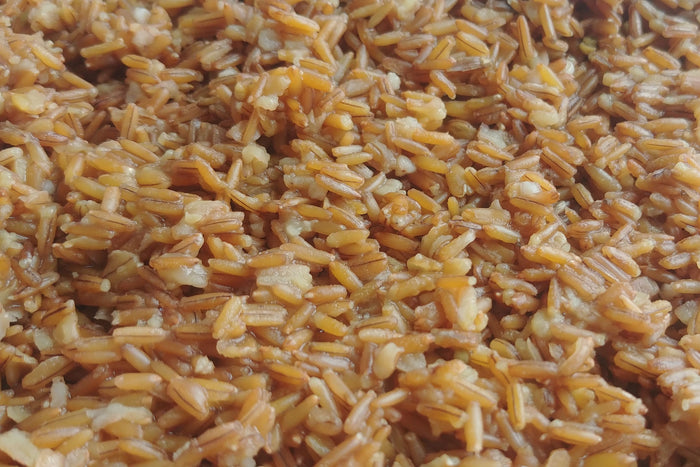 How to Par-Cook Kernza®Aug 28, 2020 | Christopher AbbottEssentials, Kernza GrainKernza is extremely versatile. Not only can it act as a substitute for most grains in any given recipe, the fact that it has an outstanding flavor/aroma will give the dish you’re preparing much more depth. To add to this versatility, Kernza can be “par-cooked” ahead of time with just water and a little salt. With the par-cooked grain in your arsenal, all one needs to do is add any combination of veggies, proteins, or seasonings on hand (think left-overs), and enjoy as a chilled salad or heated as a quick stir fry. The grain itself is fairly resilient, and can easily handle a second heating. It pairs well with harder spices such as cinnamon, allspice, clove, etc. along with honey, brown sugar, and brown butter, but it is by no means limited to that profile. There really is no limit as to what Kernza works well with!
Kernza is extremely versatile. Not only can it act as a substitute for most grains in any given recipe, the fact that it has an outstanding flavor/aroma will give the dish you’re preparing much more depth. To add to this versatility, Kernza can be “par-cooked” ahead of time with just water and a little salt. With the par-cooked grain in your arsenal, all one needs to do is add any combination of veggies, proteins, or seasonings on hand (think left-overs), and enjoy as a chilled salad or heated as a quick stir fry.
The grain itself is fairly resilient, and can easily handle a second heating. It pairs well with harder spices such as cinnamon, allspice, clove, etc. along with honey, brown sugar, and brown butter, but it is by no means limited to that profile. There really is no limit as to what Kernza works well with!
-
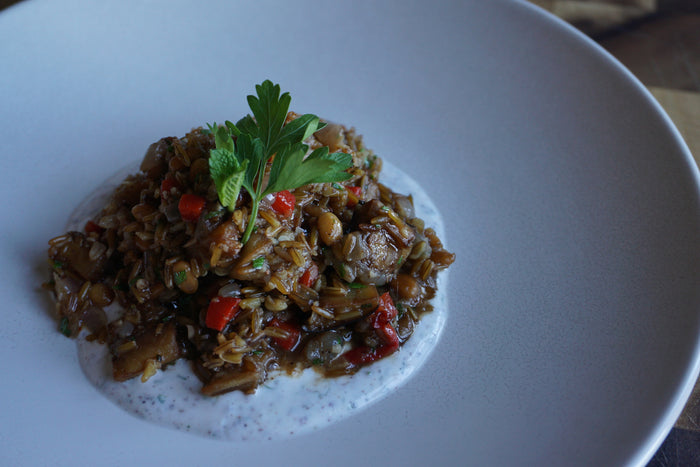 Middle Eastern Influenced Kernza®Aug 21, 2020 | Joe KaplanKernza Grain
This recipe was inspired by “Musakhan,” a popular Palestinian dish. Spices like cinnamon and allspice pair wonderfully with Kernza, and sumac (the dominant spice in Musakhan) is also a Midwest staple.
This recipe was inspired by “Musakhan,” a popular Palestinian dish. Spices like cinnamon and allspice pair wonderfully with Kernza, and sumac (the dominant spice in Musakhan) is also a Midwest staple. Win-win! Feel free to add more of your favorite herbs, or substitute vegetable stock for chicken stock to make it vegetarian!
In Advance:
- Soak 80g (½ Cup) of Kernza and ¼ Tsp. Salt with enough water to cover completely for a minimum of 8 hours. Up to overnight.
- Slice Eggplant into “coins” or “planks” (bisections), salt each side of slice, lay flat between two layers of paper towels (or on a resting rack), and let sit for at least an hour up to over night.

- Dice sliced eggplant and fry in ½ inch of olive oil over medium high heat.

- Drain diced/fried eggplant on paper towels. Salt while hot.

- Prep. yogurt
- Blend Spices
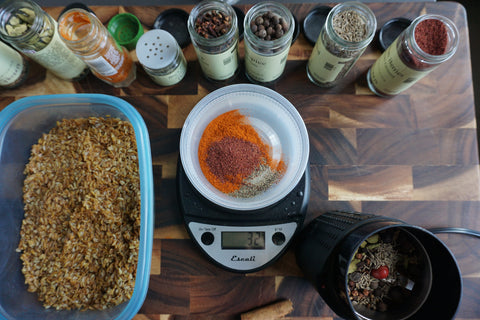
Method (Using Soaked Kernza)
-
Add oil and pine nuts to sauce pot, and heat together on medium heat until nuts are a light golden brown. Stir Constantly!

- Remove pine nuts, and reserve oil.
- With the reserved oil and same sauce pot, heat on medium, and add the diced onion. Sweat until just beginning to turn translucent.
- Add garlic and stir for about 30 seconds.
- Add spice blend, bay leaf, clove, and cardamom, stir for another 30 seconds.
- Add Kernza and salt. Stir until combined.
- Pour in chicken stock. Stir until combined.
- Bring mixture to a boil, cover, and drop heat until mixture is at a steady simmer.
- Cover pot, and set timer for 30 minutes.
- After 30 minutes, remove lid and if necessary, continue stirring over heat until the liquid coats the grain and does not pool or leech out of the mixture.
- Remove pot from the heat, add in red pepper, fried eggplant, parsley/mint, and mix to combine
- Adjust salt to your liking.
- Serve “family style” with yogurt on the side, or individually by spooning Kernza on top of a thin layer of yogurt.
- Garnish with Parsley and Mint (torn or whole).
- Enjoy warm!

Yogurt Method:
- Finely mince dill and mint
- Combine all ingredients in small mixing bowl. Whisk to combine.
- Adjust salt & lemon to your liking.
Ingredients
Kernza
- Roughly 1 Cup Kernza (after soaking, rinsing, draining)
- 1 Cup Chicken stock
- 1/2ea. Onion
- 2 Cloves Garlic
- 1/2ea.-1ea. Eggplant (diced-½ inch-& fried)
- 1/4 Cup Roasted Red Pepper (From a jar is fine)
- 2 Tbsp Parsley (rough chop or torn)
- 6ea. Mint Leaves (rough chop or torn)
- 1/4 Cup Pine Nuts
- 2 ½ Tsp. Spice Blend
- 2ea. Clove
- 2ea. Cardamom pod
- 1ea. Bay Leaf
- 2 Tbsp Olive Oil
- ½ Tsp. Salt
Spice Blend
(All ground, parts by weight. Volume is acceptable if scale is not available)
- 2 parts Sumac
- 1 part Cinnamon
- 1 part Allspice
- ½ part Black Pepper
- ½ part Paprika
Yogurt
- 1/2 Cup Yogurt (using Faye 2%)
- 3 Tbsp Buttermilk
- 1/2 tsp. Sumac
- 2 tsp. Dill
- Packed ½ Tsp. Mint Leaves
- 1 tsp. Lemon Juice
- ¼ tsp. Salt
Equipment
- Medium Sauce Pot w/Lid
- Strainer (Optional)
- Rubber Spatula
- Digital Scale (Optional but recommended)
- Spice Grinder (If not using pre-ground spices)
- Mixing Bowls &/or Tupperware
-
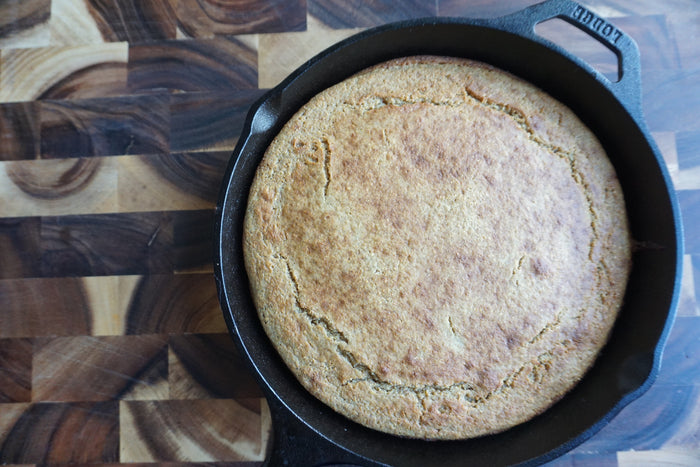 Kernza® CornbreadAug 21, 2020 | Christopher AbbottBreadThis recipe was created to accent kernza’s unique flavors and aromas such as: honey, brown sugar, caramel, and brown butter in an easy and rustic setting.
This recipe was created to accent Kernza’s unique flavors and aromas such as: honey, brown sugar, caramel, and brown butter in an easy and rustic setting. It is meant to be baked and served straight from the cast iron skillet. This will keep it warm for a very long time, and makes a fantastic centerpiece at the table!
-
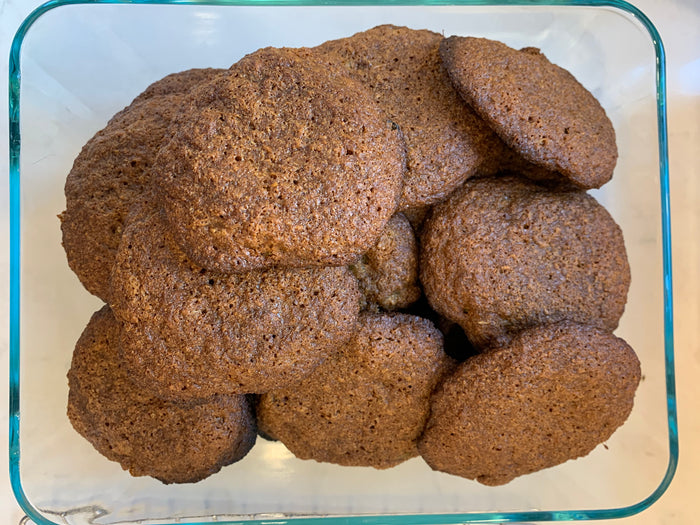 Ginger SnapMar 01, 2022 | David Abbott
 -
 Kernza® Cinnamon RollsApr 26, 2021 | Amy KasparBaked Goods, Breakfast
On my first attempt, the dough did not rise the way I wanted it too. Could have been a number of things. I didn't want to waste my dough (especially the kernza flour!) so I continued on with the recipe. I allowed it to rise for the second time in the baking pan and the dough ended up tripling in size! I continued on with the recipe and it turned out to be more like coffee cake than cinnamon rolls the first time. Still great and no complaints. When I tried the recipe again, I allowed the dough to rise for double the allowed time and that seemed to work better. It still did not rise like I thought it would (likely due to the density of the flour) but I can't get over the flavor the kernza brings to these favorite recipes. The nutty flavor goes well with this recipe along with swapping out vanilla extra for almond extract gave it an extra "wow factor" my family was not complaining about. I would not be fearful of trying this recipe out and making it your own!
Method
1. In a bowl, combine warm milk, yeast, sugar, salt, butter, and eggs. Add in flour. Mix on low speed (using dough hook if using stand mixer).
2. Once the flour starts to incorporate into the dough, increases the speed to medium. Add more whole wheat flour as needed so that the dough pulls away from the sides of the bowl.
3. Transfer dough to a lightly greased mixing bowl. Cover with a towel and let rise until double in size, about 1-2 hours.
4. Lightly grease a baking sheet. Punch down the dough an roll into a 12 inch by 18 inch rectangle.
5. Brush the dough with 1/2 cup melted butter. In a small bowl, combine the brown sugar and cinnamon. Sprinkle on top of the melted butter. Roll up tightly lengthwise. Using a bread knife, cut the dough into 12 one inch slices.
6. Place the slices onto a lightly greased 9X13 baking pan. Cover and let rise again for 30-45 minutes.
7. Preheat oven to 325 degrees. Bake the rolls for about 15-20 minutes.
8. Prepare the glaze by whipping together cream cheese and butter in a bowl until light and fluffy. Whip in powdered sugar and vanilla extract. Add milk and continue to stir until well combined.
9. Frost the rolls while still warm. Serve immediately or cool and store for up to 4-5 days.Ingredients
DOUGH
- 1 cup warm milk (we used whole milk)
- 1 TBS instant dry yeast
- 2 TBS white cane sugar
- 1 tsp salt
- 3 Tbs salted butter
- 1 large eggs
- 1 cup kernza
- 1 1/4 cup white flour
- 1 1/4 cup whole wheat flour
FILLING
- 1/2 cup salted butter, melted
- 1 cup brown sugar
- 2 TBS cinnamon
GLAZE
- 4 ounces cream cheese, softened
- 1/4 cup salted butter, softened
- 1 cup powdered sugar
- 1/2 tsp vanilla extract (or almond extract)
- 2 TBS milk
Equipment
- Handheld or stand mixer
- Mixing bowls
- Spatula
- dishcloth
- 9X13 baking pan
- bread knife
-
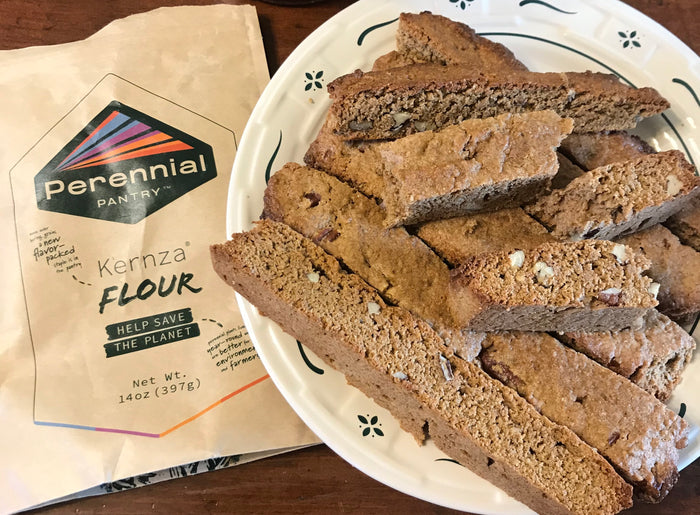 Bourbon and Kernza® BiscottiApr 26, 2021 | Amy KasparBaked Goods, Cookies1. Preheat oven to 350 degrees. Line a baking sheet or 8X8 baking pan with parchment paper.
2. Combine the flours, baking powder, salt and spice. Set aside.
3. Mix on medium to low speed the butter, brown sugar and can sugar until light and fluffy. Add the eggs, one at a time, mixing well after each addition. Stir in the bourbon and vanilla.
4. Slowly add the dry mixture to wet mixture, mixing with spatula just until combined then stir in the pecans, if desired.
5. Transfer the dough to baking sheet or pan. Shape the dough into a rectangle about 3 1/2 inches wide and 3/4 inch tall. The Dough will be a bit sticky and that is okay. Use whole wheat flour on fingertips if necessary to help you shape it.
6. Bake in oven for 25 minutes. Remove the pan from the oven and allow to cool for 7-10 minutes.
7. Use the parchment paper to transfer the biscotti to a cutting board. Using a bread knife, cut the biscotti into 2/4 inches crosswise slices.
8. Line the baking sheet with new parchment paper and place the biscotti, cut side down, onto the pan.
9. Bake for 22 minutes, or until browned. Cool on the pan for 10 minutes then transfer the biscotti to a wire rake to cool completely. Enjoy!Ingredients
- 1 cup whole wheat flour
- 1 cup kernza flour
- 1 tsp baking powder
- 1/2 tsp salt
- 1/2 tsp cinnamon (or 1/4 nutmeg and 1/4 cloves pending on preference of spices)
- 1/2 cup unsalted butter, softened (can also use a butter substitute, such as Earth Balance butter if dairy free)
- 1/2 cup firmly packed light brown sugar
- 1/4 cup cane sugar
- 2 large eggs
- 2 Tbs bourbon
- 1/2 tsp vanilla extract
- 1 cup chopped pecans (can omit if sensitivity to nut allergies)
Equipment
- parchment paper
- 8X8 baking pan
- cutting board and bread knife
- stand or hand held mixer
- spatula
-
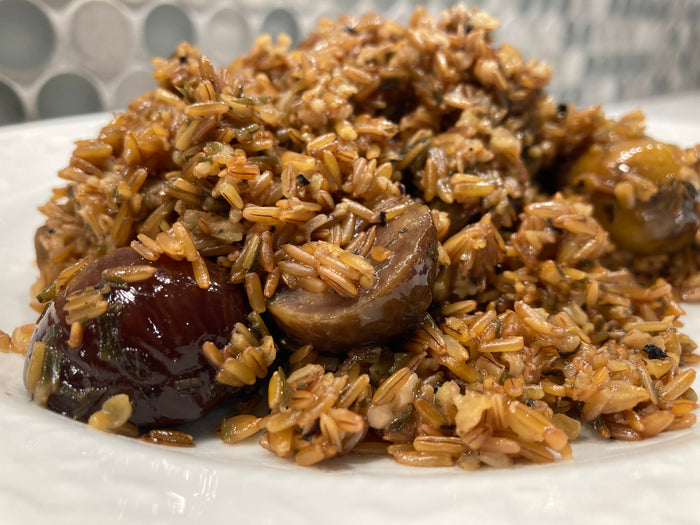 Chestnut Kernza®Apr 14, 2021 | Jeremy EmmiKernza Grain
Overview
A simple, healthy recipe. The chestnuts complement the Kernza grain and highlight the earthy flavors, while the spices add a bright, fresh feel. Very easy to make and the prep time outside of boiling is minimal.Directions
Boil the Kernza for 30-35 minutes, then add the olive oil and chestnuts and cover for 5 minutes. Then turn off heat and mix in the remaining ingredients, adding water or lemon juice to desired moistness. Let set for a few minutes and serve.Ingredients
- 3/4 cup Kernza grain
- 3/4 cup water
- 3/4 cup vegetable broth
- 5 oz. whole pre-cooked, shelled chestnuts
- 1/4 cup lemon juice
- 2 tbsp. olive oil
- 2 tbsp. parsley
- 2 tsp. tarragon
- 2 tsp. spearmint leaves
- 1 tsp. cayenne pepper
- Salt or pepper to taste
Equipment
- 1 4-quart pot
-
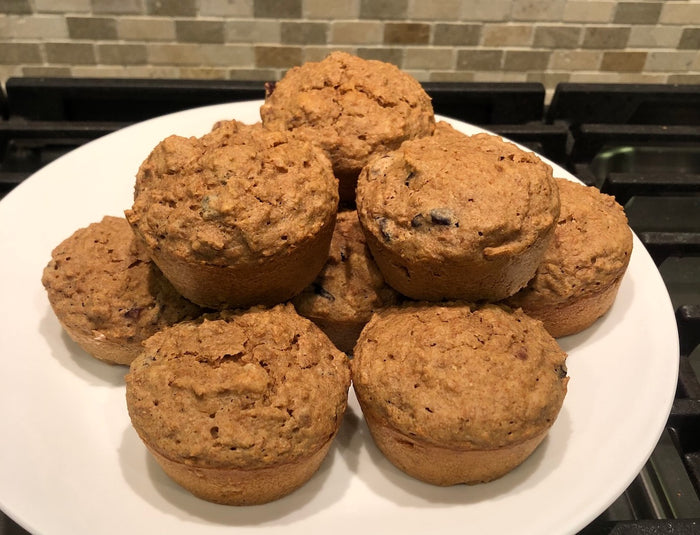 Kernza® Bran muffinsApr 14, 2021 | P J KlingerBaked Goods
Directions
- Put the wet ingredients in the All Bran to soften it.
- Mix all dry ingredients in a separate bowl.
- Add wet ingredients into the dry ingredients and mix well.
- Bake at 400 for 20 minutes
Ingredients
- 2 cups All Bran
- 1 cup Kernza flour
- 1/4 cup Quinoa flour
- 1/4 cup craisens
- 1/4 cup walnuts chopped
- 1/4 cup sugar or stevia
- 1 TBS baking powder;
- 1 cup buttermilk
- 1/2 cup milk
- 1 egg
- 2 TBS walnut oil
Equipment
- 2 mixing bowls
- 1 muffin pan
-
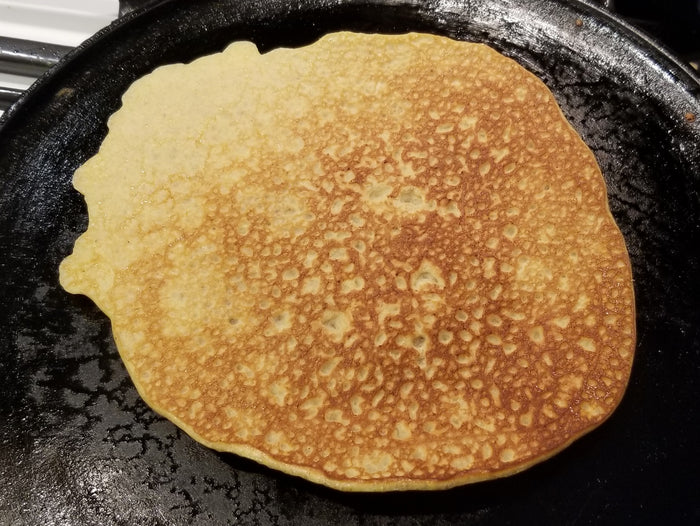 Slender, Tender Kernza® PancakesMar 01, 2021 | Jonathan Teller-ElsbergBreakfast
Directions
- In a large mixing bowl, mix all dry ingredients.
- Crack all five eggs into the dry mix, blend with a whisk
- Add milk and vanilla extract, blend well with whisk
- Set pan (cast iron recommended) on high heat for 1 minute to preheat, then turn heat down to low-medium (adjust as needed during cooking)
- Wipe very thin coating of oil or butter on pan
- Add scoop batter to pan (1/3 cup batter makes regular size pancake), cook first side until surface appears just barely dry, flip and cook 10-15 more seconds, remove from heat
- Repeat until batter is used up
Note
Serve with traditional sweet toppings (maple syrup, fruit, etc.) or savory (e.g., sautéed vegetables and crumbled feta cheese).Ingredients
Dry
- 1 cup Kernza Flour
- dash salt
- 1/4 tsp baking powder
Wet
- 5 eggs
- 1 cup milk
- dash vanilla extract
- oil or butter for coating pan
-
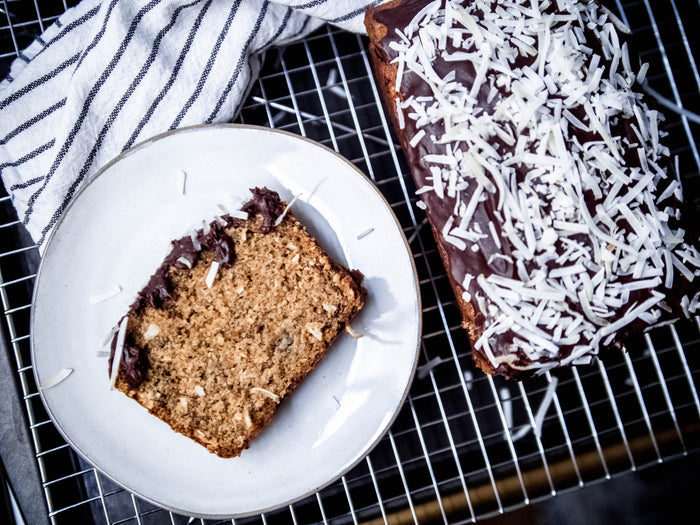 Kernza® Banana Bread w. Coconut Chocolate GlazeJan 24, 2021 | Kate HahnBread, Desserts
Instructions
- Preheat oven to 350 F. Grease or line a standard loaf pan with parchment paper.
- In a medium bowl, mix the flours, baking powder, baking soda, ground ginger, and salt.
- In a separate large bowl, mash ripened banana. Then add the coconut oil, sugar, and coconut. Beat eggs separately, then add the eggs, vanilla and milk to the other wet ingredients.
- Gently, stir the flour mixture into the wet ingredients, careful not to overmix. Pour the batter into the prepared pan and bake 25-35 minutes or until toothpick comes out clean. Allow to cool before glazing.
- To make the glaze, melt the chocolate in a bowl in the microwave with just enough water to surround the squares. Times will vary depending on microwave power, but start with 15 second increments and stir between each. Even if the chocolate doesn't look melted, sometimes with the warm water and a stir it'll finish melting. Once completely melted, slowly stir in powdered sugar until you reach your desired consistency. Keep in mind it will thicken as the chocolate cools. Add more water if needed. Pour chocolate glaze on top of the loaf and finish with a sprinkle more of shredded coconut. Enjoy!
Ingredients
Bread
- 1 1/4 cup Kernza Flour
- 1 1/4 cup white AP flour
- 2 teaspoons baking powder
- 1/2 teaspoon baking soda
- 1/2 teaspoon salt
- 1 1/2 teaspoons ground ginger
- 1/2 cup mashed ripe banana (about 1 large)
- 1/2 cup coconut oil (slightly warmed if not already melted)
- 1/2 cup coconut sugar
- 1/2 cup shredded coconut
- 2 eggs
- 1 teaspoon vanilla extract
- 1 cup milk (or coconut milk for a non-dairy alternative)
Chocolate Glaze
- 2 oz semi-sweet baking chocolate (if in bar form, 2 squares)
- Splash of water
- 1/2 - 1 cup powdered (confectioners) sugar
Equipment
Standard loaf pan, mixing bowls
-
 Perennial Blueberry Ginger SconesJan 01, 2021 | Lane JohnsonBaked Goods, SconesThese wholesome scones are made with wild blueberries and crystalized ginger. The Kernza version of this recipe was adapted from a recipe published in Real Simple Magazine, August 2015. Wild frozen or fresh blueberries can be used, but frozen berries will hold up better when the scones are being formed. The ginger is a strong component of this recipe and can be reduced for those who have an aversion to bold flavors.
Scones can sometimes be dry and crumbly but this recipe produces a hearty scone that is dense but not crumbly. These are best fresh from the oven, and shared, but they also reheat nicely.These wholesome scones are made with wild blueberries and crystalized ginger. The Kernza version of this recipe was adapted from a recipe published in Real Simple Magazine, August 2015. Wild frozen or fresh blueberries can be used, but frozen berries will hold up better when the scones are being formed. The ginger is a strong component of this recipe and can be reduced for those who have an aversion to bold flavors.
Scones can sometimes be dry and crumbly but this recipe produces a hearty scone that is dense but not crumbly. These are best fresh from the oven, and shared, but they also reheat nicely.Instructions
- Heat oven to 375 degrees F. line a large baking sheet with parchment paper.
- Whisk together the flours, granulated sugar, baking powder, and salt in a large bowl. Add the cut butter and blend with a pastry blender or your fingers until crumbly. Fold in the blueberries and ginger. Stir in the milk
- Transfer the dough to a lightly floured surface and form into two 6-inch disks. Using a knife, cut each disk into 6 wedges. Place the wedges on the prepared sheet, brush with milk, and sprinkle with turbinado sugar.
- Bake, rotating once, until golden brown, 25 to 30 minutes. If the scones are not browned after 25 minutes, move the pan to the top of the oven to finish baking. Cool on the pan. Serve warm or at room temperature.
Note
I've never baked scones before, so I don't know how this recipe compares to others out there. Overall, I was satisfied with the end product. I think the Kernza compliments the blueberry and ginger nicely and I'd make some variation of this again. Serve these with English breakfast tea spiked with sweetfern (Comptonia peregrina) simple syrup and cream.
Ingredients
- 2 cups unbleached all-purpose flour, plus extra for shaping
- 1 cup Kernza Flour
- 1/3 cup + 1 tbsp granulated sugar
- 1 tsp kosher salt
- 12 tbsp cold unsalted butter, cut into pieces
- 1 1/4 cups frozen wild blueberries
- 1/2 cup chopped or diced crystallized ginger
- 3/4 cup milk, plus extra for brushing scones before baking
- 1 tbsp baking powder
- Turbinado sugar, for sprinkling
Equipment
- Rolling pin
- Pastry cutter (this recipe can be mixed by hand but a pastry cutter helps)
-
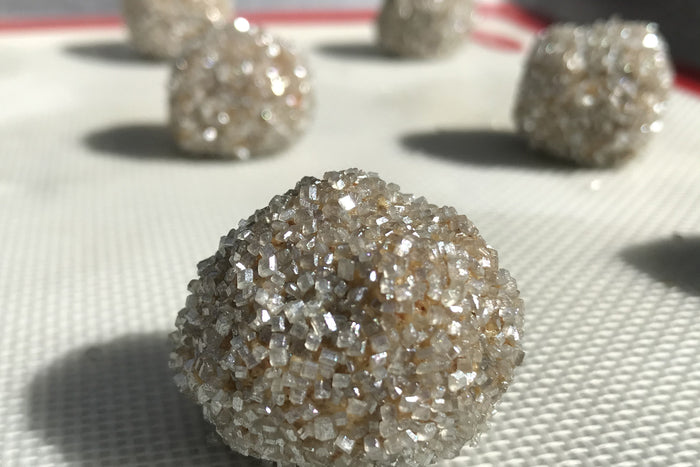 Kernza® Silver ButtonsNov 02, 2020 | Jennifer HedbergCookies
This is a submission for the 2020 StarTribune Cookie Contest. I wanted to use Kernza flour for make my submission. I have followed a 1 to 1 substitution model for every recipe I try with the hope of replacing standard wheat flour in our diet. I've made killer biscuits, crepes and muffins. I've noticed that sometimes it likes a little more liquid, but otherwise, it replaces standard flour extremely well.
How did I pick the flavor direction for this recipe?
As Belinda Jensen mentioned in her piece about Kernza® at the MN State Fair last year, "Kernza® has a nutty flavor with undertones of molasses . . .". One of my favorite holiday foods is a stout gingerbread, so I easily started down that path. Then I thought of cardamom which is synonymous with Christmas in our family—going back generations. I believe that is why I love Garam Masala with its bewitching combination of cardamom, cumin, coriander, black pepper, cinnamon, cloves, and nutmeg. I add it to all sorts of food, so why not cookies. I imagined adding a dollop of apricot, fig or pear jam on top that would act as a wonderful complement, so I googled "beautiful spice cookie pear jam" and found a compelling recipe by the Jam Lab. It sounded amazing but too complex for this purpose, so I simplified it down to its key elements of alluring spices and a stunning coat of silver sanding sugar.This is a submission for the 2020 Star Tribune Cookie Contest. I wanted to use Kernza flour for my submission. I have followed a 1 to 1 substitution model for every recipe I try with the hope of replacing standard wheat flour in our diet. I've made killer biscuits, crepes and muffins. I've noticed that sometimes it likes a little more liquid, but otherwise, it replaces standard flour extremely well.
How did I pick the flavor direction for this recipe?
As Belinda Jensen mentioned in her piece about Kernza® at the MN State Fair last year, "Kernza® has a nutty flavor with undertones of molasses . . .". One of my favorite holiday foods is a stout gingerbread, so I easily started down that path. Then I thought of cardamom which is synonymous with Christmas in our family—going back generations. I believe that is why I love Garam Masala with its bewitching combination of cardamom, cumin, coriander, black pepper, cinnamon, cloves, and nutmeg. I add it to all sorts of food, so why not cookies. I imagined adding a dollop of apricot, fig or pear jam on top that would act as a wonderful complement, so I googled "beautiful spice cookie pear jam" and found a compelling recipe by the Jam Lab. It sounded amazing but too complex for this purpose, so I simplified it down to its key elements of alluring spices and a stunning coat of silver sanding sugar.Instructions
- Preheat the oven to 350 degrees F.
- Prepare a baking sheet with parchment paper or silicone baking liner.
- In a medium bowl, whisk together the Kernza® flour, salt, ground pistachios, garam masala, ginger, cardamom, and nutmeg.
- In the bowl of a stand mixer, with a paddle attachment, cream together the butter and sugar — whisking for 2-3 minutes until pale yellow in color and fluffy, at high speed. Now add in the vanilla extract and egg and whisk again till blended. Scrap the sides of the bowl to gather the mixture into the center. Add in the flour mixture and mix at low speed until just combined. Do not overmix.
- Pour some silver sanding sugar into a small flat bowl.
- Use a mini cookie scoop or a tablespoon scoop and roll small 1" balls. Roll each ball into the silver sanding sugar and cover completely.
- Place them on a baking sheet with a parchment paper about 2 inches apart. Bake the cookies for about 11 minutes until cookies are just set. Remove them from the oven and let them cool on the baking sheet for about 10 minutes. Transfer the cookies to a wire rack and let them cool completely.
These cookies should keep in the fridge for about a week. I also like to use the age-old trick of storing them in a bag with half an apple to keep them moist.
What I love about these cookies? They are stunning in their simplicity, with mouth-watering spices and novel ingredients. They have a lovely crunch followed by an airy softness that I adore. I hope you will also fall in love with this cookie and its key ingredient—Kernza®.Ingredients
- 1 3/4 cup Kernza® Flour
- 1/2 teaspoon salt
- 1/4 cup ground pistachio nuts
- 1 1/2 teaspoon Garam Masala
- 1 teaspoon ground ginger
- 1 teaspoon ground cardamom
- 1/4 teaspoon nutmeg powder
- 2/3 cup granulated sugar
- 6 tablespoons unsalted butter, room temperature
- 1 large egg
- 2 teaspoons vanilla extract
Decorations
- 1/2 cup of silver sanding sugar (from Wilton - I found it at Michael's in the cake decorating section)
-
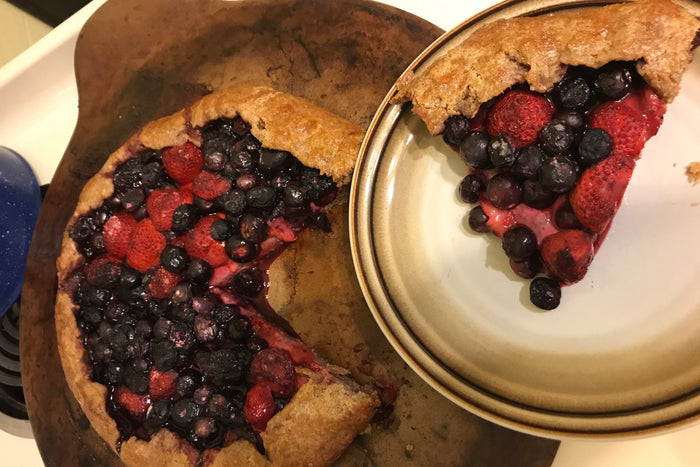 Rustic Kernza® Berry TartNov 01, 2020 | Amy KasparDesserts, TartsThis tart can be enjoyed during both summer and winter! We also added some homemade ice cream to top of this tart. The nutty flavor of the kernza adds a lot of rich flavor that didn’t compare when I tried this recipe with all purpose flour. Kernza made it much better!
This tart can be enjoyed during both summer and winter! We also added some homemade ice cream to top of this tart. The nutty flavor of the kernza adds a lot of rich flavor that didn’t compare when I tried this recipe with all purpose flour. Kernza made it much better!
Instructions
- In a large mixing bowl, mix flowers, pinch of salt, and sugar.
- Grate butter into bowl, add cold water and mix well.
- Refrigerate for 30 minutes. Meanwhile mixed together you’re filling: add berries, sugar, cornstarch in bowl.
- Preheat oven to 400°.
- After dough has chilled, flour a smooth surface and roll out chilled dough. Make sure it’s not too thin, about 5 cm thick is recommended on bottom.
- Place filling in the middle of your dough and fold up sides, covering some of the berries. Sprinkle another tablespoon or two of sugar on top of the berries.
- Next mix the egg whites in a bowl until frothy. Using a pastry brush, brush egg whites onto outer edge pastry crust.
- Bake 35 to 40 minutes in oven.
Ingredients
Filling
- 1 cup blackberries
- 1 cup strawberries
- 2 cups blueberries
- 4 tbsp sugar
- 3 tbsp cornstarch
Pastry
- 9 ounces butter stick
- 1 1/2 cups whole wheat flour
- 1 cup Kernza Flour
- 2 tablespoons sugar
- 175 ml cold water
- 1 egg white
Required Equipment
Large mixing bowl, spatula, baking pan, and cheese grater
-
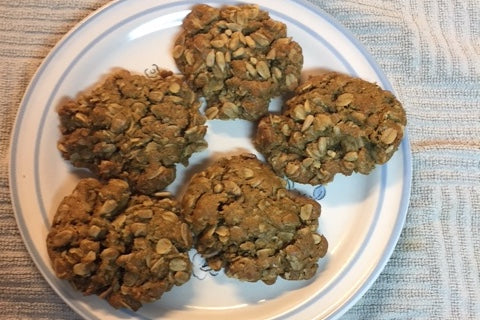 SunburstsOct 20, 2020 | Elin K. ColglazierCookies
Instructions
- Cream butter with sugars, add eggs and vanilla.
- Add sun butter and stir in flour with soda. Add oatmeal and sunflower seeds. Mix well.
- Chill 30 minutes.
- Divide into balls, flatten, and put extra sunflower seeds atop each.
- Bake at 350 degrees for 12-15 minutes.
Ingredients
- 1/2 c. Butter
- 1 c. Brown sugar
- 1/2 c. White sugar
- 3 eggs
- 1 t. Vanilla
- 1/2 c. Kernza Flour
- 1/2 c. Hudson Cream Flour unbleached (substitute All-Purpose Flour)
- 2 t. Soda
- 1 1/2 C. Sunflower butter
- 3 c. Oatmeal
- 1/2 c. Sunflower seeds
-
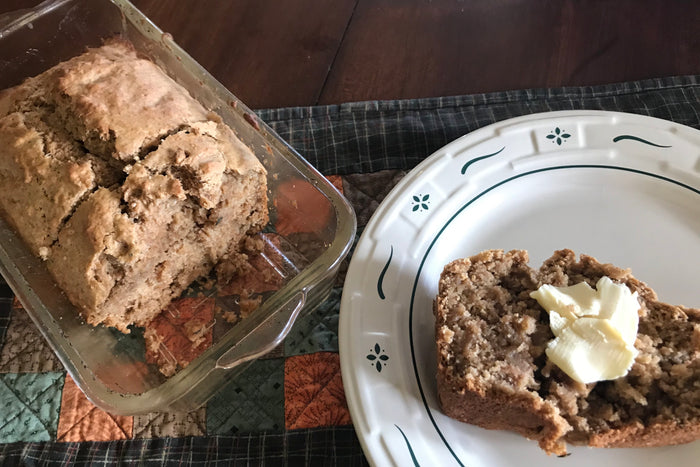 Kernza® Beer BreadOct 20, 2020 | Amy KasparBread
This is a delicious bread recipe! I used cane sugar and fresh garlic which I feel enhanced the favor of this recipe. I also used Sam Adams Boston lager but I wish I had access to kernza beer made by Patagonia! I used thyme as an added seasoning but you could easily omit this or substitute for rosemary or sage. After I made this bread, it was gone within two days! Enjoy!
Instructions- Preheat oven to 375°. Grease loaf pan.
- In a large mixing bowl, combine flour, baking powder, salt, sugar, and thyme.
- Add garlic, melted butter, and beer. Mix well.
- Bake for 45 minutes.
- Allow to cool for 10 minutes prior to serving.
Ingredients
- 1 cup sifted bread flour
- 1 cup sifted whole wheat flour
- 1 cup sifted Kernza Flour
- 1 tablespoon baking powder
- 1 teaspoon salt
- 2 teaspoons thyme
- 3 tablespoons sugar
- 1 tablespoon minced garlic
- 4 tablespoons melted butter 12 ounces beer
Mixing bowl, Flour sifter (or a wire mesh colander), spatula, loaf pan
-
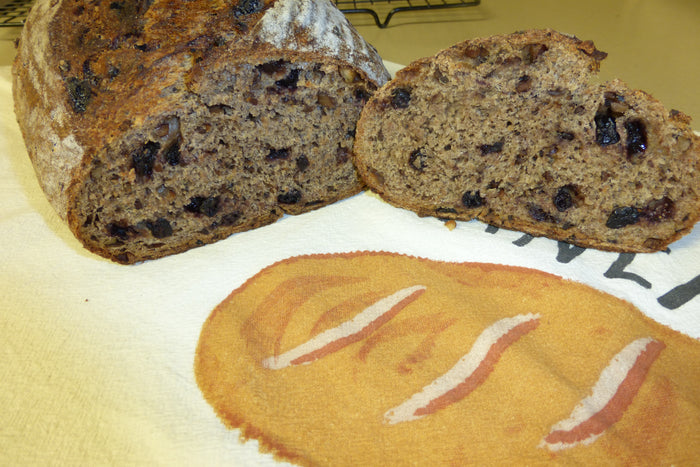 Blueberry-Lemon Kernza®Oct 14, 2020 | John MundingerBreadMy sourdough bread file includes a recipe for cranberry-orange bread. This is the blueberry-lemon variation of that recipe, substituting Kernza for a portion of the whole grain flour.
My sourdough bread file includes a recipe for cranberry-orange bread. This is the blueberry-lemon variation of that recipe, substituting Kernza for a portion of the whole grain flour.
Instructions
- Chop the pecans, toast in a dry frying pan over medium heat. Set aside.
- Zest 2 lemons and set aside. (Meyer lemons preferred)
- Juice 2 lemons and add sufficient water to make 400 grams liquid.
- Melt the butter. Stir the butter, honey and lemon zest into the liquid.
- Stir the whole wheat, Kamut and Kernza flour into the liquid and let rest for 2 hours (autolyse).
- Stir the starter into the dough.
- Stir the dried blueberries and chopped pecans into the dough.
- Blend the salt into the AP flour and mix into the dough until the flour is completely incorporated. Cover and let stand for 30 minutes.
- Do a series of 4 or 5 “stretch & folds” at 30 minute intervals, resting the dough in between.
- Cover and let the dough stand at room temperature for an additional 2 to 4 hours. Then refrigerate the dough and bulk ferment for another 12 hours. During the bulk ferment, the dough should about double in volume.*
- Remove the dough from the refrigerator, degas the dough and shape the dough. Place the dough into a proofing basket that has been dusted with rice flour. Cover and let stand for about an hour or until the dough has doubled in volume.
- Place the baking vessel (clay baker or dutch over) in the oven. Preheat the oven to 450 degrees F.
- Remove the pre-heated base of the baking vessel from the oven, place the dough onto the base, cover and return to the oven for 25 minutes. I used a clay baker for this loaf and transferred the dough to the baker on a piece of parchment to avoid blueberry stains on the baker.
- Remove the cover and bake for an additional 20 minutes.** The bread is done when the internal temperature reaches 200 to 205 degrees F.***
- Remove from the oven. Let cool for one hour and savor your handiwork.
Notes
*Timing for the bulk ferment is variable, depending on the temperature at which the dough is proofed. Refrigeration retards the process. Proofing time would be shorter if the dough is proofed at warmer than room temperature.
**If a softer crust is desired, increase the covered baking time
***Baking times will vary, depending on oven performance.Cranberry-Orange Kernza
Substitute zest and juice of one orange (Valencia orange preferred), walnuts and craisins for the lemon, pecans and blueberries.
Ingredients
- Zest of 2 lemons
- 400 grams (1 3/4 cup) liquid, juice of 2 lemons plus water
- 150 grams (1 1/3 cup) whole wheat flour
- 150 grams (1 1/3 cup) Kamut flour
- 100 grams (7/8 cup) Kernza Flour
- 100 grams (7/8 cup) AP flour
- 75 grams (1/3 cup) starter
- 2 T unsalted butter
- 30 grams (2 T) honey
- 9 grams (1 t) salt
- ½ cup chopped pecans, toasted
- ½ cup dried blueberries
Equipment
- Kitchen scale
- Clay baker or dutch oven, preferred but not essential
-
 Honey Kernza®Oct 09, 2020 | John MundingerBreadThis recipe is an adaptation of the “Honey Whole Wheat” recipe that is found on the packaging for Bob’s Red Mill Stoneground Whole Wheat. The recipe was first converted to sourdough and revised again by substituting Kernza for the whole wheat flour. Honey Kernza is sweeter and has a nutty, more complex flavored compared with Honey Whole Wheat.
The posted recipe is the second attempt to bake Honey Kernza. The initial attempt was a straight conversion from the base recipe, substituting 250 grams of Kernza for 250 grams of whole wheat, and mixed at 72% hydration. For the second attempt, I reduced the Kernza and AP to 200 grams and added 100 grams of whole wheat. I also increased the hydration to 80%. The result was better gluten development.This recipe is an adaptation of the “Honey Whole Wheat” recipe that is found on the packaging for Bob’s Red Mill Stoneground Whole Wheat. The recipe was first converted to sourdough and revised again by substituting Kernza for the whole wheat flour. Honey Kernza is sweeter and has a nutty, more complex flavored compared with Honey Whole Wheat.
The posted recipe is the second attempt to bake Honey Kernza. The initial attempt was a straight conversion from the base recipe, substituting 250 grams of Kernza for 250 grams of whole wheat, and mixed at 72% hydration. For the second attempt, I reduced the Kernza and AP to 200 grams and added 100 grams of whole wheat. I also increased the hydration to 80%. The result was better gluten development.Instructions
- Heat milk to 180 degrees
- Melt the butter with the honey and add to the scalded milk.
- Add the water to the milk mixture.
- After the milk mixture has cooled to lukewarm temperature, stir in the Kernza; whole wheat and 100 grams of AP flour. Let stand for 2 hours.
- Blend 75 grams of ripe sourdough starter into the previous mixture.
- Mix the salt into the remaining AP flour (100 grams) and blend into the dough. Mix until the flour is completely incorporated. Cover and let stand for 30 minutes.
- Do a series of 4 or 5 “stretch & folds” at 30 minute intervals, resting the dough in between.
- Cover and let the dough stand at room temperature for an additional 2 to 4 hours. Then refrigerate the dough and bulk ferment for another 12 hours. During the bulk ferment, the dough should about double in volume.
- Remove the dough from the refrigerator, degas the dough and shape the dough. Place the dough into a lightly oiled and dusted loaf pan. Cover and let stand for about an hour, until the dough has doubled in volume.
- Tent the loaf pan with a sheet of tinfoil, shaped to the pan. Place in a cold oven.*
- Heat the oven to 425 degrees F. Begin timing when the oven has come up to temperature.
- Bake for 25 minutes, remove the tinfoil and bake for an additional 25 minutes, or until the internal temperature of the bread is 200 to 205 degrees, F.**
Notes
*The cold start, rather than, beginning in a pre-heated oven is optional. I prefer to bake this recipe in a terra cotta loaf pan for which the manufacturer recommends a cold start to avoid thermal shock.
**Baking time will vary, depending on oven performance.
The recipe could be baked using one package of active yeast instead of the sourdough starter. If so, begin by scalding the milk, mixing in the butter and honey and letting the mixture cool to room temperature. When the milk is cooled to lukewarm, add the yeast and let stand for 10 to 15 minutes. Then, mix all of the ingredients, knead well and let stand for about 2 hours. When the dough has doubled, continue with shaping the dough.Ingredients
- 200 grams water (3/4 cup + 1 T)
- 200 grams scalded milk (3/4 cup + 1 T)
- 200 grams Kernza Flour (1 3/4 cup)
- 100 grams whole wheat flour (7/8 cup)
- 200 grams All Purpose flour (1 3/4 cup)
- 30 grams honey (2 T)
- 2 T unsalted butter
- 75 grams ripe sourdough starter (1/3 cup)
- 9 grams sea salt (1 t)
Required Equipment
- Kitchen Scale
-
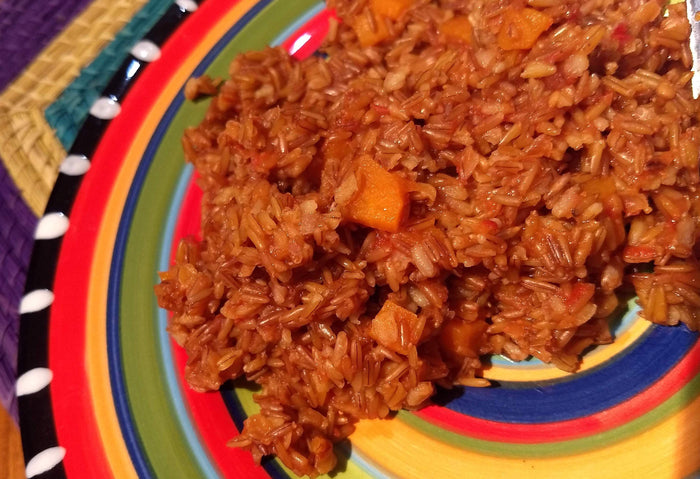 Kernza® a la MexicanaOct 08, 2020 | Alex ArujKernza GrainSavory dish adapted from a Mexican rice (Arroz a la mexicana) recipe.
Savory dish adapted from a Mexican rice (Arroz a la mexicana) recipe.
Instructions
- Blend the chopped garlic and onion with the vegetable broth. Blend until uniform.
- Add 2-3 tablespoons of oil in your pot over low-medium heat.
- Toast and stir 1.5 cups kernza in the oil for 3-5 minutes on a low-medium heat setting.
- Add the chopped carrot and cook for 1-2 minutes.
- Add the blended liquid mixture to the pot and secure the lid on your pot or pressure cooker.
- Pressure cook for 20 min. on default setting.
- Release pressure for 5 min (quick release valve).
- Stir and taste a few grains to ensure it is done to your liking. It will have some 'bite' to it, but should be done. Remove lid and serve.
Notes
On first attempt we thought 15m pressure was too little, so we put lid back on and pressure-cooked for five minutes, hence we believe 20 minutes pressure is sufficient. Feel free to try 25-30 minutes! However, I would predict the kernza will have some toothy al dente bite to it! I would be curious to know how soaking the kernza for 30 minutes would affect the final dish.
1.5 cups kernza to 2 cups water turned out to be excellent proportions for 20 minutes of pressure cooking, since it kept a little bit of juice left over for residual absorption and deliciousness.
We served the dish with green beans and brussel sprouts minus the parmesan using this recipe.
Ingredients
- 2 cups (16 fl. oz.) veg broth
- Quarter of a small-medium onion rough chopped
- 1 clove garlic rough chopped
- 3 small tomatoes rough chopped
- 2 small carrots peeled and diced
- 1.5 cups (300 g) kernza grain
- 2 tbsp oil (coconut or olive according to your preference)
Required Equipment
- Blender
- Pressure cooker / Stovetop Pot / Instapot
-
 Heirloom Kernza®Oct 05, 2020 | John MundingerBreadI have been baking sourdough bread for several years. Most of the bread that I bake use a blend of flours with a preponderance of whole grain flours, including the heirloom varieties, Kamut and spelt. This recipe blends those two varieties with Kernza, a 21st Century variety of flour.
This recipe produced a hearty loaf of with all the nutritional benefits of the whole grain bread. The Kernza contributed to a rich, complex flavor profileI have been baking sourdough bread for several years. Most of the bread that I bake use a blend of flours with a preponderance of whole grain flours, including the heirloom varieties, Kamut and spelt. This recipe blends those two varieties with Kernza, a 21st Century variety of flour.
This recipe produced a hearty loaf of with all the nutritional benefits of the whole grain bread. The Kernza contributed to a rich, complex flavor profile.Instructions
- Mix together 410 grams of water, 100 grams Kernza, 150 grams Kamut, 100 grams spelt and 60 grams whole wheat flours and let stand for 2 hours (the autolyze).
- Blend 75 grams of ripe sourdough starter into the previous mixture.
- Mix the salt into the remaining whole wheat flour (90 grams) and blend into the dough. Mix until the flour is completely incorporated. Cover and let stand for 30 minutes.
- Do a series of 4 or 5 “stretch & folds” at 30 minute intervals, resting the dough in between.
- Cover and let the dough stand at room temperature for an additional 2 to 4 hours. Then refrigerate the dough and bulk ferment for another 12 hours. During the bulk ferment, the dough should about double in volume.*
- Remove the dough from the refrigerator, degas the dough and shape the dough. Place the dough into a proofing basket that has been dusted with rice flour. Cover and let stand for about an hour or until the dough has doubled in volume.
- Place the cloche in the oven. Preheat the oven to 450 degrees F.
- Remove the pre-heated base of the cloche from the oven, place the dough onto the base, cover and return to the oven for 25 minutes.
- Remove the cloche cover and bake for an additional 20 minutes.** The bread is done when the internal temperature reaches 200 to 205 degrees F.***
- Remove from the oven. Let cool for one hour and savor your handiwork.
Notes
*Timing for the bulk ferment is variable, depending on the temperature at which the dough is proofed. Refrigeration retards the process. Proofing time would be shorter if the dough is proofed at warmer than room temperature.
**If a softer crust is desired, increase the covered baking time
***Baking times will vary, depending on oven performance.Sprouted Kernza Variation
The basic bread that I bake uses a blend of flours, at least 75% whole grain and I usually include an addition. One addition that I have used is a sprouted grain (Kamut, quinuoa, lentils or garbanzo beans). So, it made sense to try sprouting Kernza berries (75 grams berries/loaf). After 4 days, fewer than half of the berries sprouted but I still used to result to bake a loaf. I followed the above recipe, blending the berries into the dough after adding the starter. Although the sprouting effort was marginal, the resulting loaf was satisfying.

Sprouted Kernza Variation
A soaker is another addition that I use. For the soaker, I toast 75 grains/loaf of some type of cereal (steel cut oats, rolled oats, multi-grain cereal etc.) over medium heat in a dry frying pan. The toasted grain is then soaked in 75 grams of water for 2 hours. I modified that method a bit when I made the Kernza soaker. It took a short 10 minutes to toast the berries. I removed the berries from the heat after the berries had turned to a reddish brown color. Other indications that the process was complete were the aroma, the appearance of steam rising from the pan and the popping of some of the berries. Then, I covered the berries with water

and let that stand for four hours before draining and adding to the dough. The resulting bread has a robust flavor and a pleasant crunch.

Ingredients
- 410 grams water (1 ¾ cups)
- 100 grams Kernza Flour (7/8 cup)
- 150 grams Kamut whole grain flour (1 1/3 cup)
- 150 grams whole wheat flour (1 1/3 cup)
- 100 grams spelt flour (7/8 cup)
- 75 grams ripe sourdough starter (1/3 cup)
- 9 grams sea salt (1 t)
Required Equipment
- Kitchen scale
- Proofing basket (optional)
- Cloche or Dutch oven (or other suitable baking vessel)
- Thermometer
-
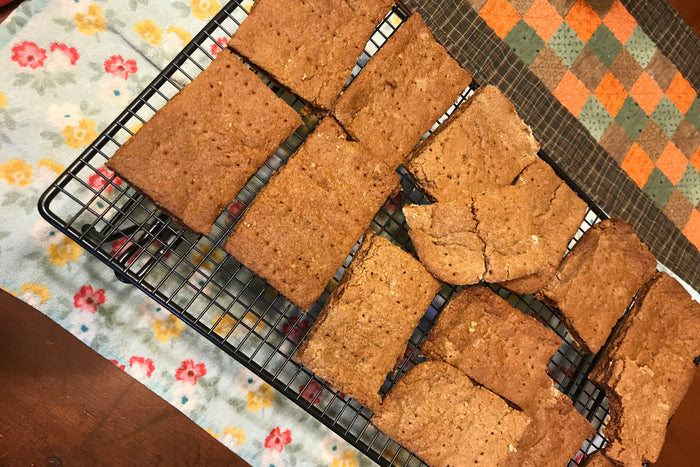 Kernza® Graham CrackersOct 05, 2020 | Amy KasparCrackers
Instructions
- In a medium bowl, whisk together flour, cinnamon, Kernza Flour, baking soda and salt. Set aside.
- In another large bowl, cream butter and sugar. Beat until light and fluffy. Reduce speed to Low adding in flour mixture slowly.
- Add milk, honey and vanilla extract. Mix together.
- Place in an airtight container and chill for one hour.
- Preheat oven to 350°.
- Roll out dough onto floured surface. Place on baking sheet and sprinkle with extra flour. Score each sheet of dough into rectangles and dock with a bamboo skewer. Pierce with fork.
- Bake until firm about 16 minutes. Cut with pizza cutter while still hot. Cool on drying rack.
Ingredients
- 1 1/3 cup whole wheat flour
- 2/3 cup Kernza Flour
- 1 teaspoon cinnamon
- 1 teaspoon baking soda
- 1/2 teaspoon salt
- 8 tablespoons butter
- 1 cup light brown sugar
- 3 tablespoons 2% milk
- 1/3 cup honey
- 2 teaspoons vanilla
Equipment Needed
Mixing bowl, spatula, drying rack, bamboo skewers, fork, and two cookie sheets
-
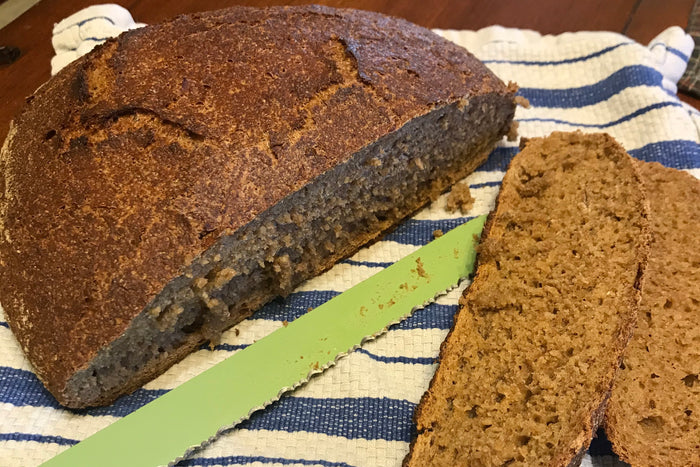 Rustic Kernza® BreadOct 05, 2020 | Amy KasparBread
Instructions
- Mixed together both flours in a large bowl.
- Make a well in the middle of the bowl. Add more water in Yeast to bowl.
- Mix well and form into a ball.
- Let’s sit overnight or eight hours at room temperature.
- When ready, preheat oven to 450°. Bake covered in cast iron skillet for 30 minutes. Bake uncovered an additional 20 minutes.
- Cool immediately on drying rack for 5 to 10 minutes. Enjoy!
Ingredients
- 2.5 cups whole wheat flour
- 1.25 cups Kernza flour
- 1 tsp dry yeast
- 2 cups warm water
Equipment Needed
Large mixing bowl, cast iron skillet, Spatula and drying rack
-
 Kernza® Chocolate Chip CookiesSep 30, 2020 | Patrick AbbottCookiesI had an unexpected afternoon off and my fresh bags of Perennial Pantry Kernza flour, so I decided to try to make chocolate chip cookies. I applied a little research about Kernza to my go-to recipe meant it took a little longer than normal, but honestly the end result was one of the best batches of chocolate chip cookies I've ever made.
Most ratios adopted from a whole wheat chocolate chip cookie recipe to account for Kernza's high fiber content, but substituting baking powder for baking soda to add some leavening. Brown butter suggestion adopted from gluten free cookie recipe to compensate for Kernza's low gluten content. Additional chilling step and steel cut oats added because the pre-chips cookie dough mixture was more liquid than normal, and oats resulted in a good dough consistency. Cooking time was slightly longer than normal chocolate chip cookies, but the result was also better. Seriously good cookies.I had an unexpected afternoon off and my fresh bags of Perennial Pantry Kernza flour, so I decided to try to make chocolate chip cookies. I applied a little research about Kernza to my go-to recipe meant it took a little longer than normal, but honestly the end result was one of the best batches of chocolate chip cookies I've ever made.
Most ratios adopted from a whole wheat chocolate chip cookie recipe to account for Kernza's high fiber content, but substituting baking powder for baking soda to add some leavening. Brown butter suggestion adopted from gluten free cookie recipe to compensate for Kernza's low gluten content. Additional chilling step and steel cut oats added because the pre-chips cookie dough mixture was more liquid than normal, and oats resulted in a good dough consistency. Cooking time was slightly longer than normal chocolate chip cookies, but the result was also better. Seriously good cookies.Recipe Instructions
- Mix Kernza Flour (2 cups), baking powder (1 tsp), and salt (1 tsp) in a bowl until thoroughly uniform. Set aside.
- Heat butter (two sticks) in a small saucepan until it is slightly browned and bubbling. Remove from heat and let cool for at least 2 minutes.
- Put white and light brown sugar (3/4 cup each) and vanilla extract (1 tsp) in a large mixing bowl.
- Pour melted butter over sugar mixture and mix thoroughly with a wooden spoon until most of the sugar has broken up.
- Add egg (1) to sugar-butter mixture and continue to stir with a wooden spoon until the texture is uniform.
- Add 1/2 cup of dry flour mixture to liquid sugar-butter mixture and stir until it has a uniform consistency. Repeat until all of the dry flour mixture is incorporated into cookie dough mixture. The mixture should be a bit runny.
- Place the mixture in the refrigerator for 5 minutes.
- Add chocolate chips and steel cut oats to the dough mixture and mix thoroughly with a wooden spoon.
- Place dough in the refrigerator for at least 20 minutes.
- Set oven to 375 F/190 C. Form dough into 1.5 inch/4 cm balls using hands or a spoon and place on buttered baking sheets at least 3 inches/8 cm apart. The dough should yield about 20 cookies.
- Place baking trays on the middle rack of the oven for at least 10 minutes. Cookies are done when their edges are crisp but the center of the cookies are still moving with heat.
- Remove from oven and sprinkle pinches of kosher salt on hot cookies. Let the them rest for at least 20 minutes. Enjoy!
Ingredients
- 2 Cups Kernza Flour
- 1 tsp baking powder
- 1 tsp kosher salt (plus more for sprinkling)
- 1 cup (2 sticks) unsalted butter
- 3/4 cup white sugar
- 3/4 cup light brown sugar
- 1 tsp vanilla extract
- 1 egg
- 12 oz bag chocolate chips
- 1 cup steel cut oats
-
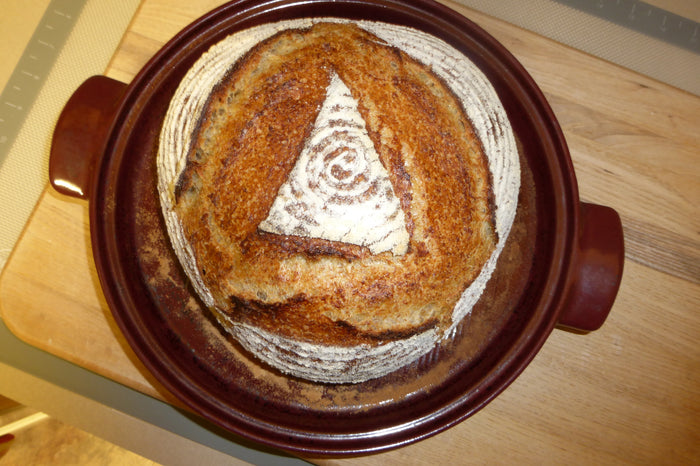 Kountry Kernza®Sep 30, 2020 | John MundingerBreadI have been baking sourdough bread for several years. Most of the bread that I bake use a blend of flours with a preponderance of whole grain flours. I use some Kamut, an heirloom variety of wheat, in most of my breads. I decided to experiment with the 21st Century variety – Kernza.
To get a sense for how Kernza performs, I decided to begin with a basic sourdough recipe, a variation on the Sourdough Country Loaf recipe in Tartine Bread. This recipe is an adaptation that substitutes Kernza for the whole wheat flour.
I have been baking sourdough bread for several years. Most of the bread that I bake use a blend of flours with a preponderance of whole grain flours. I use some Kamut, an heirloom variety of wheat, in most of my breads. I decided to experiment with the 21st Century variety – Kernza.
To get a sense for how Kernza performs, I decided to begin with a basic sourdough recipe, a variation on the Sourdough Country Loaf recipe in Tartine Bread. This recipe is an adaptation that substitutes Kernza for the whole wheat flour.Recipe Instructions
- Mix together 350 (1 1/2 C) grams of water, 100 grams (7/8 C) Kernza and 250 grams (2 C) AP flour, let stand for 2 hours (the autolyze).
- Blend 75 grams of ripe sourdough starter into the previous mixture.
- Mix the salt into the remaining AP flour (150 grams/1-1/4 C) and blend into the dough. Mix until the flour is completely incorporated. Cover and let stand for 30 minutes.
- Do a series of 4 or 5 “stretch & folds” at 30 minute intervals, resting the dough in between.
- Cover and let the dough stand at room temperature for an additional 2 to 4 hours. Then refrigerate the dough and bulk ferment for another 12 hours. During the bulk ferment, the dough should about double in volume.*
- Remove the dough from the refrigerator, degas the dough and shape the dough. Place the dough into a proofing basket that has been dusted with rice flour. Cover and let stand for about an hour or until the dough has doubled in volume.
- Place the cloche in the oven. Preheat the oven to 450 degrees F.
- Remove the pre-heated base of the cloche from the oven, place the dough onto the base, cover and return to the oven for 25 minutes.
- Remove the cloche cover and bake for an additional 20 minutes.** The bread is done when the internal temperature reaches 200 to 205 degrees F.***
Additional comments:
*Timing for the bulk ferment is variable, depending on the temperature at which the dough is proofed. Refrigeration retards the process. Proofing time would be shorter if the dough is proofed at warmer than room temperature.
**If a softer crust is desired, increase the covered baking time
***Baking times will vary, depending on oven performance.
For consideration:
As an alternative to leavening the dough with sourdough starter, the home baker could use a poolish. Mix together 100 grams of water, 100 grams of AP flour and ¼ teaspoon active yeast. Let stand for about 12 hours. Then, add ¼ teaspoon active yeast, the remainder of the water and flour and the salt. Continue with the stretch & folds. Complete the bulk fermentation at room temperature and shape the dough after the dough has doubled in volume.
Equipment
- Kitchen scale
- Proofing basket (optional)
- Cloche or Dutch oven (or other suitable baking vessel)
- Thermometer
-
 Kernza® Drop BiscuitsSep 22, 2020 | Collin SchwantesBaked GoodsDelicious Kernza Drop Biscuits. Baking biscuits always makes your house smell wonderful and the Kernza flour takes that to another level.
Delicious Kernza Drop Biscuits. Baking biscuits always makes your house smell wonderful and the Kernza flour takes that to another level. I didn't add any sugar and they were plenty sweet. They were also fantastic with strawberry rhubarb jam.
Instructions
- Preheat oven to 450 F.
- Assemble dry ingredients (white flour, Kernza flour, baking powder, salt)

- Work butter into dry ingredients pea size crumb forms.
**Pro tip: it is easier to work in grated butter. To grate, use frozen butter with a cheese grater. - Add milk and mix until just incorporated.

- Split dough into balls about 2-3 in in diameter

- Bake for 12 minutes.
- Enjoy!
Equipment Needed
- Kitchen scale
- Pan
- Mixing bowl
- Cheese grater (optional)
-
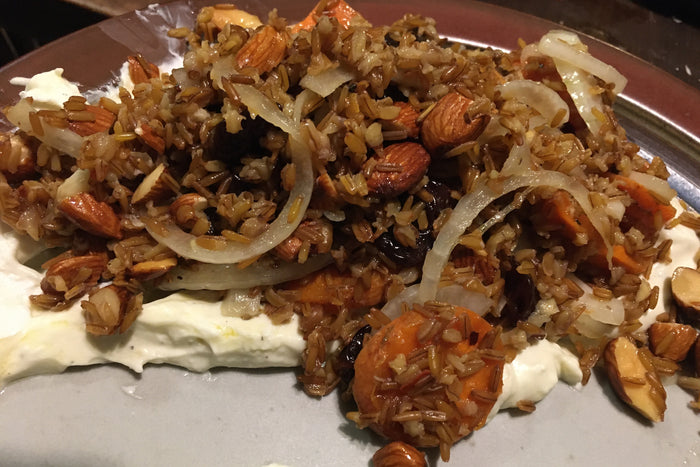 Kernza® Grain SaladSep 14, 2020 | Brent SaxtonKernza Grain
Adapted from The Six Seasons cookbook. This grain salad is a scrumptious way to highlight and deepen the Kernza's nutty flavor. As far as I'm concerned, anytime I'm eating Kernza whole grain in a savory dish I intend to toast it as I describe in steps 1-3, whether those steps are followed by the rest of the recipe or not!
Just about everything in this recipe can be swapped out for a similar ingredient that will bring completely new flavor despite serving a similar role--apricots or other dried fruit for the cherries; feta, ricotta, cream cheese for the goat cheese; already roasted sunflower seeds or pistachios for the almonds. Indeed, without the extra, gourmet steps for whipped goat cheese and brined almonds, this becomes a very easy side that can be thrown together at a moments notice! This dish welcomes fresh herbs, parsley, chives, tarragon all fit in so nicely, but don't be afraid to throw in some basil, mint, or other more divergently flavored herbs to really spice it up!
Instructions
- Cover the bottom of a large sauce pan with olive oil, add the smashed garlic and chili flakes, and let saute for about 3 minutes.
- Add the cup of Kernza whole grain and cook over medium heat, stirring to toast the grains. The longer you toast, the deeper the flavor--At least 4-5 minutes.

- Add 2 cups water, 1 tablespoon salt, and the bay leaf, and bring to a boil. Cover, adjust heat to low, and cook for about 25-35 minutes. Taste Kernza towards the end to determine if it's a suitable texture. You may need to strain a bit of the water at the end.
- Meanwhile, brine the almonds. Heat oven to 375 F. Bring a small saucepan with 1/2 cup water to a boil then take off the heat. Dissolve 2-3 tablespoons salt, dump in the 3/4 cup almonds, stir so the almonds all submerge, and let sit for 30 minutes.
- Toss the carrots with olive oil, salt and pepper, and spread out on a baking sheet. Roast until the edges start to darken, about 15-20 minutes.

- Return to the almonds. After the soak, drain the almonds, spread out evenly in one layer on a baking sheet and toast for about 12 minutes in the 375 F oven. They will be soft when you take them out, but they will cool to a delicious, salty crunch.
- Thinly slice the onion. Put the cooked Kernza, onion, roast carrots, and dried cherries in a bowl and dress with 1/4 cup red wine vinegar.
- Mix or food process the goat cheese with olive oil, salt, lots of black pepper, and vinegar or lemon juice, (and milk or water as needed) to get a smooth, smear-able cheese. Smear the whipped cheese on plates to dish the salad on top of.


- Rough chop almonds, and add them to the salad.
- Taste dish, and add more vinegar, salt, or pepper as needed. Finish by tossing the whole dish with a 1/4 cup of olive oil, and dish the salad up on top of the smeared goat cheese!
- Garnish as you see fit and enjoy. Serve hot or cold, my preference would be right in the middle (about the temperature you'll get after dressing the hot ingredients, anyway).

Ingredients
- Olive oil
- 4 cloves garlic
- 4-5 carrots
- 1/2 teaspoon chili flakes
- 1 cup Kernza Whole Grain
- Water
- Salt and pepper
- Bay leaf
- 3/4 cup raw almonds
- Handful dried cherries (about 4 oz)
- 1/4 cup red wine vinegar
- 1/2 red onion
- 6 oz goat cheese
- Garnish: Fresh herbs, lemon, feta (optional)
Equipment
Pots, pans, baking sheets
-
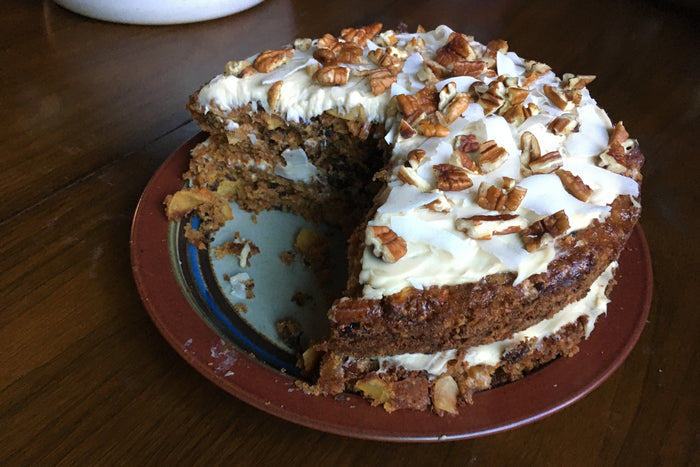 Kernza® Carrot CakeSep 10, 2020 | Caroline HermanCakeAdapted from Dorie Greenspan's "Baking." This is a delicious, pro-chunk carrot cake. Cinnamon and ginger really make the Kernza shine.
Adapted from Dorie Greenspan's "Baking." This is a delicious, pro-chunk carrot cake. Cinnamon and ginger really make the Kernza shine.
Prep
- Arrange your oven rack to the middle and preheat the oven to 325° F.
- Butter and flour the insides of two 9in. round pans (three if you have shallower pans, or would like more layers in your cake).
The cake
- In a medium bowl, whisk together the flour, baking powder, baking soda, spices and salt.
- In a large bowl, stir together the carrots, chopped pecans, coconut and cranberries so that the ingredients are well blended.
- In another large bowl use the stand mixer with a paddle attachment, or a hand mixer, to beat the sugars and oil together on medium until smooth. Add the eggs one at a time while the mixer is running. Reduce the speed to low and add the flour mixture, stop the mixer once the dry ingredients disappear. Gently fold in the carrot mixture with a wooden spoon or spatula.
- Pour the batter into the baking pans.
- Bake for 50-55 minutes, until the middle of the cakes are set, you can check with a knife.
- Cool the cakes for 5 minutes before removing them from the cake pans, then cool on racks until they are room-temperature (important for the frosting!).
The frosting
- Again, use a stand or hand mixer to blend the cream cheese, butter, brown sugar and vanilla extract until the mixture starts to become stiff.
- Pour in the honey and beat until the frosting is whipped, be careful not to overmix or the frosting will be runny.
Assembly
- Cover the top of one cake with the frosting, using a spoon to smooth it to the edges.
- Top with the second cake and frost this top as well (or the whole cake, sides included, if you would like).
- Sprinkle the reserved chopped pecans and coconut on top. The cake is ready to serve or you can refrigerate for 30 minutes beforehand to help the frosting set.
For cake
- 1 1/2 cup Kernza Flour
- 1/2 cup all-purpose white flour
- 2 teaspoons baking powder
- 2 teaspoons baking soda
- 2 teaspoons ground cinnamon
- 1 teaspoon ground ginger
- 1/4 teaspoon ground clove
- 1 teaspoon salt
- 4 to 5 cups grated carrots, grated in food processor or by hand
- 1 1/2 cup coarsely chopped pecans
- 1 1/2 cup shredded coconut
- 1/2 cup dried cranberries
- 1 1/2 cups brown sugar
- 1/2 cup granulated sugar
- 1 cup canola oil
- 4 eggs
For frosting
(you can double this if you want the whole cake frosted; the amount below was used for one layer between cakes and one layer on top of the cake, see picture)- 8 ounces cream cheese, room temperature
- 2 tablespoons unsalted butter, melted and then cooled
- 2 tablespoons brown sugar
- 1 teaspoon vanilla extract
- 1 tablespoon honey
Optional topping
- Coarsely chopped and toasted pecans
- Shredded coconut
Equipment
- Food processor with shredding blade or a regular hand grater (for carrot)
- A stand or hand mix
- Two 9 in. round cake pans
-
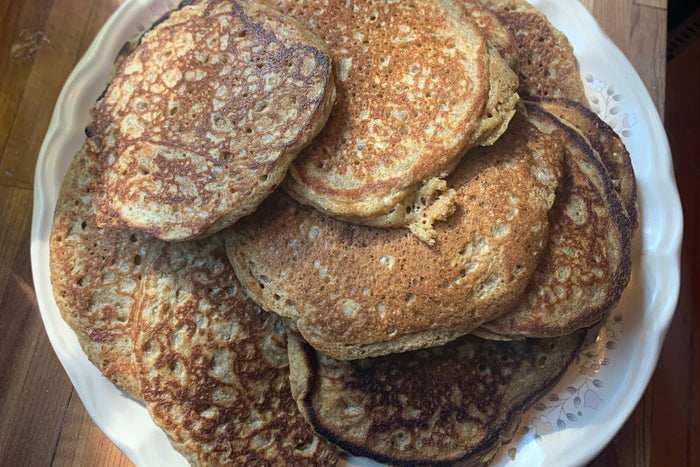 Kernza® Sourdough PancakesSep 08, 2020 | Katie WahlBreakfast
This recipe is inspired by The Perfect Loaf - a blog focused on sourdough baking but 100% Kernza Flour is used. Like many folks during the pandemic I decided to explore the world of sourdough but found myself wondering what to do with the 'discarded' sourdough. Pancakes has been the best answer in our house! I love how versatile this recipe is. If you have fresh fruit or granola around you can toss those in to the batter. You can also adjust the moisture content to your preferences with the amount of milk/yogurt. I've made this with almond milk as well.
Note - there are so many resources online for starting/maintaining a sourdough starter: The Perfect Loaf Sourdough Starter Maintenance Routine is one of them.
Instructions- In a bowl, beat the eggs and then combine with the milk, yogurt (optional), vanilla (optional) and sourdough starter. Set aside.
- In a separate bowl, mix together the flour, baking soda, baking powder, salt, sugar.
- Add the dry ingredients to the wet ingredients and combine. Then stir in the melted butter. Add more milk to get the consistency you prefer.
- Let the mixture ferment a bit, 15-30 min, and you will probably see some happy bubbles forming.
- Preheat the griddle and let it get quite hot. Putting a few drips of water on the pan should cause quite the sizzle. Add a bit of grease (I like to use butter) and dollop the pancake batter on the griddle. Flip the pancakes when you see some interior bubbles forming.
- Serve as you like!
Ingredients
- 2 large eggs
- 245g (1 cup) whole milk
- 61g (1/4 cup) Greek yogurt (optional)
- 250g (1 1/2 cup, stirred down) sourdough starter
- 4g (1 teaspoon) vanilla (optional)
- 180g (1 1/2 cups) Kernza Flour
- 6g (1 teaspoon) baking soda
- 4g (1 teaspoon) baking powder
- 5g (1 teaspoon) sea salt
- 50g (1/4 cup) granulated sugar
- 63g (1/4 cup or 1/2 stick) melted butter
Supplies
- Pan or griddle
- Medium bowl
- Spatula
- Sourdough discard


